The Nightmare Scenario
I typically spend my days modifying or repairing CNC machines. But sometimes, requests come in that make me want to run away. Today’s story is exactly one of those cases: Removing Broken Bolts.
Ideally, I would avoid this task at all costs. But due to certain circumstances (and perhaps a bit of unavoidable destiny), I couldn’t say no.
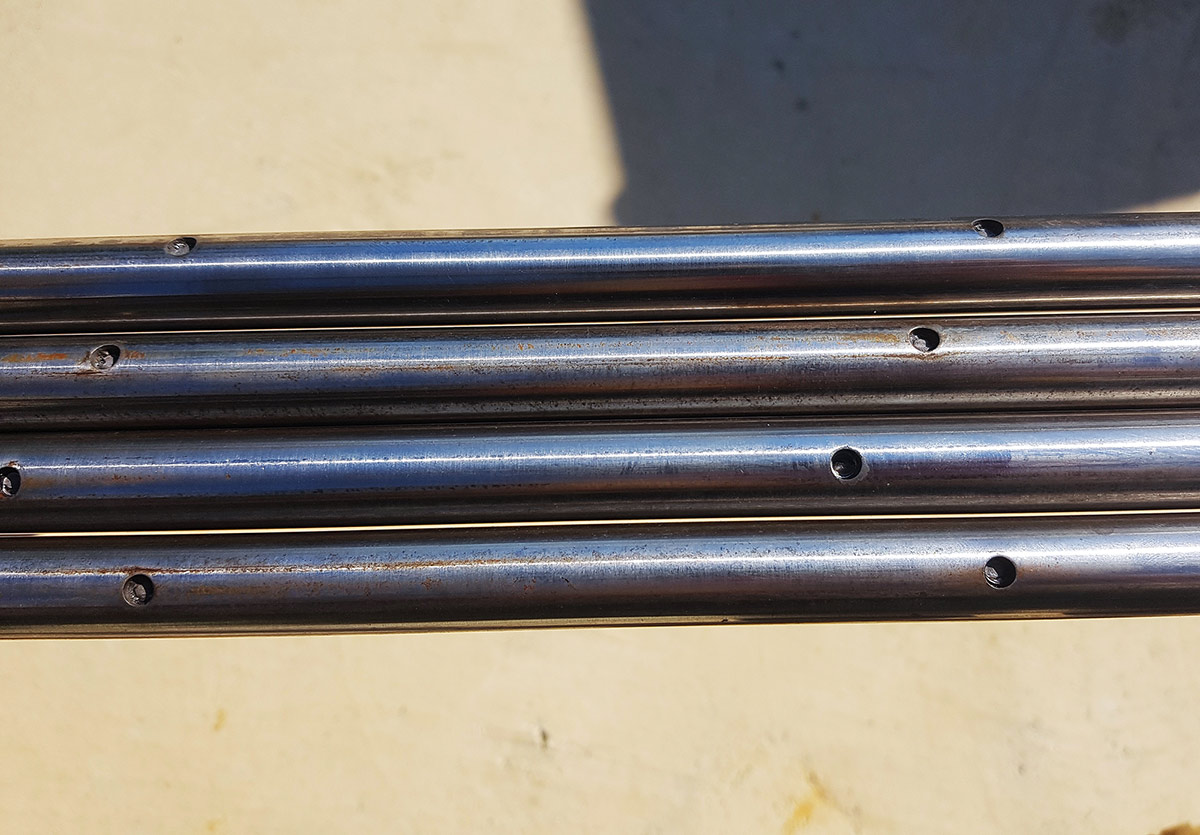
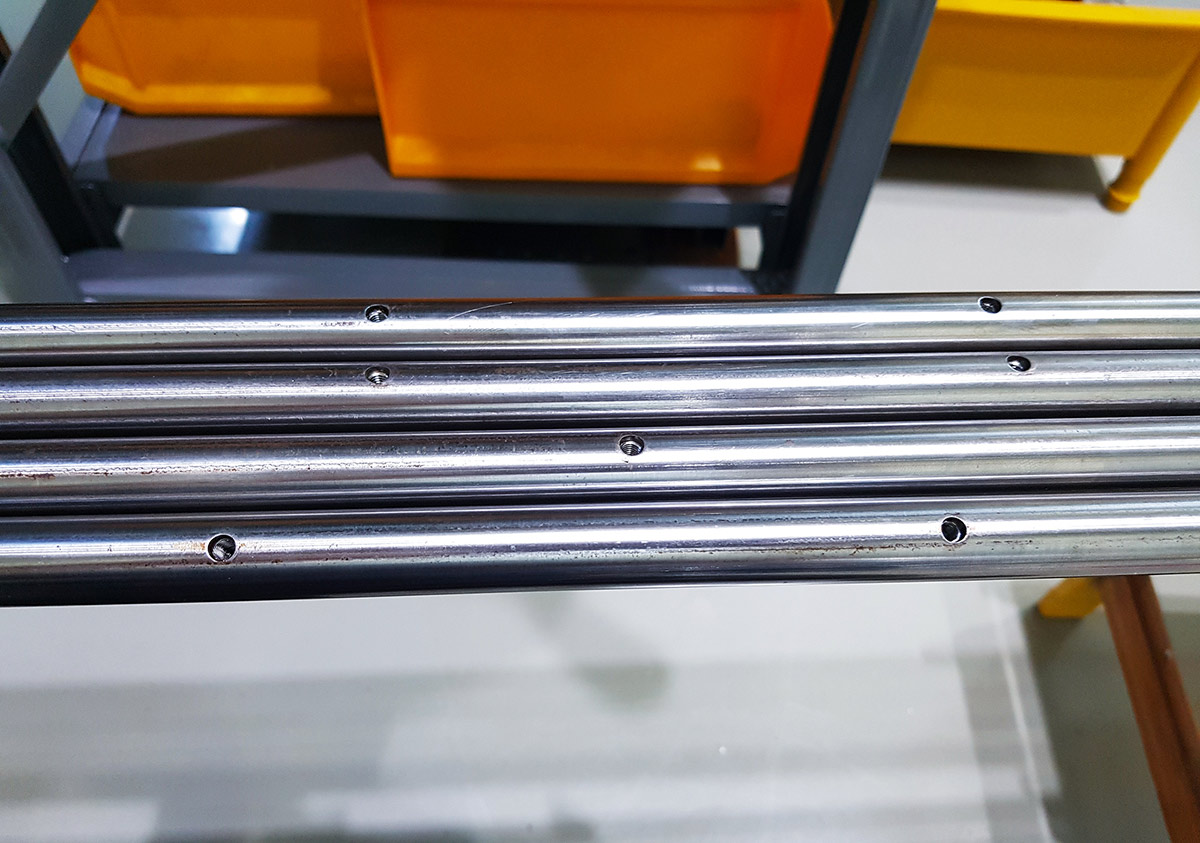
Here is the situation. I was handed these precision ground shafts (linear rods) with broken bolts stuck deep inside. Not just one or two… but over 50 of them.
To make matters worse:
- Size: Extremely small (UNF #10-32, roughly similar to M5).
- Condition: Stuck deep inside the hole with broken heads.
- The Kicker: They were coated with Thread Locker (Loctite).
- Constraint: Since these are heat-treated precision parts, I couldn’t even use heat (like a torch) to loosen them.
When I first saw this, my reaction was very professional: “Oh… Holy… Music.”
The Weapon of Choice: Screw Extractor
Since the bolts were too small for welding and I couldn’t apply heat, I had to resort to the most classic, yet most tedious method: The Screw Extractor (often called a “Reverse Tap” or “Easy Out”).
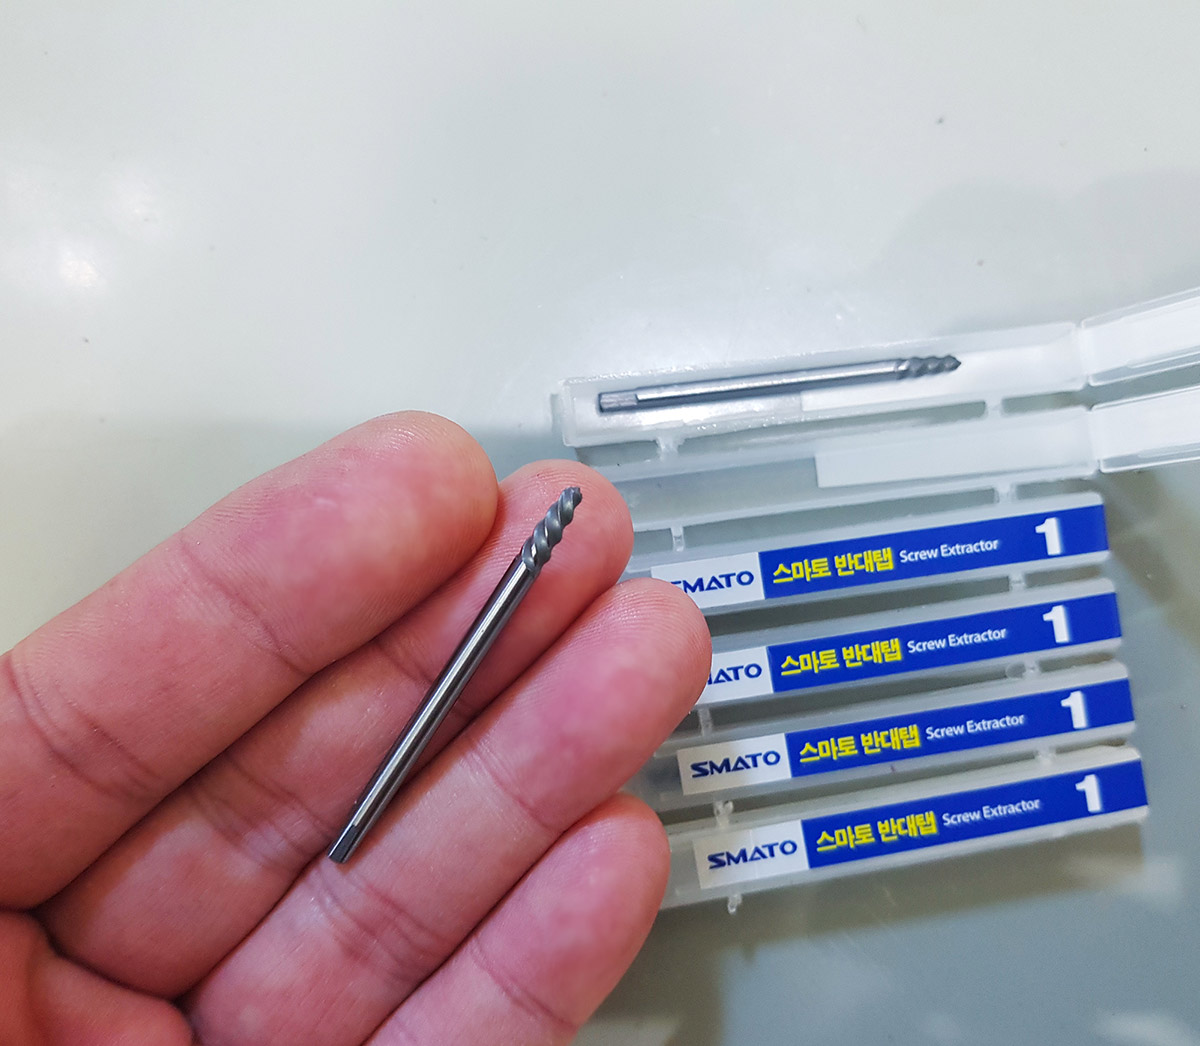
I used a #1 Screw Extractor (the smallest size available).
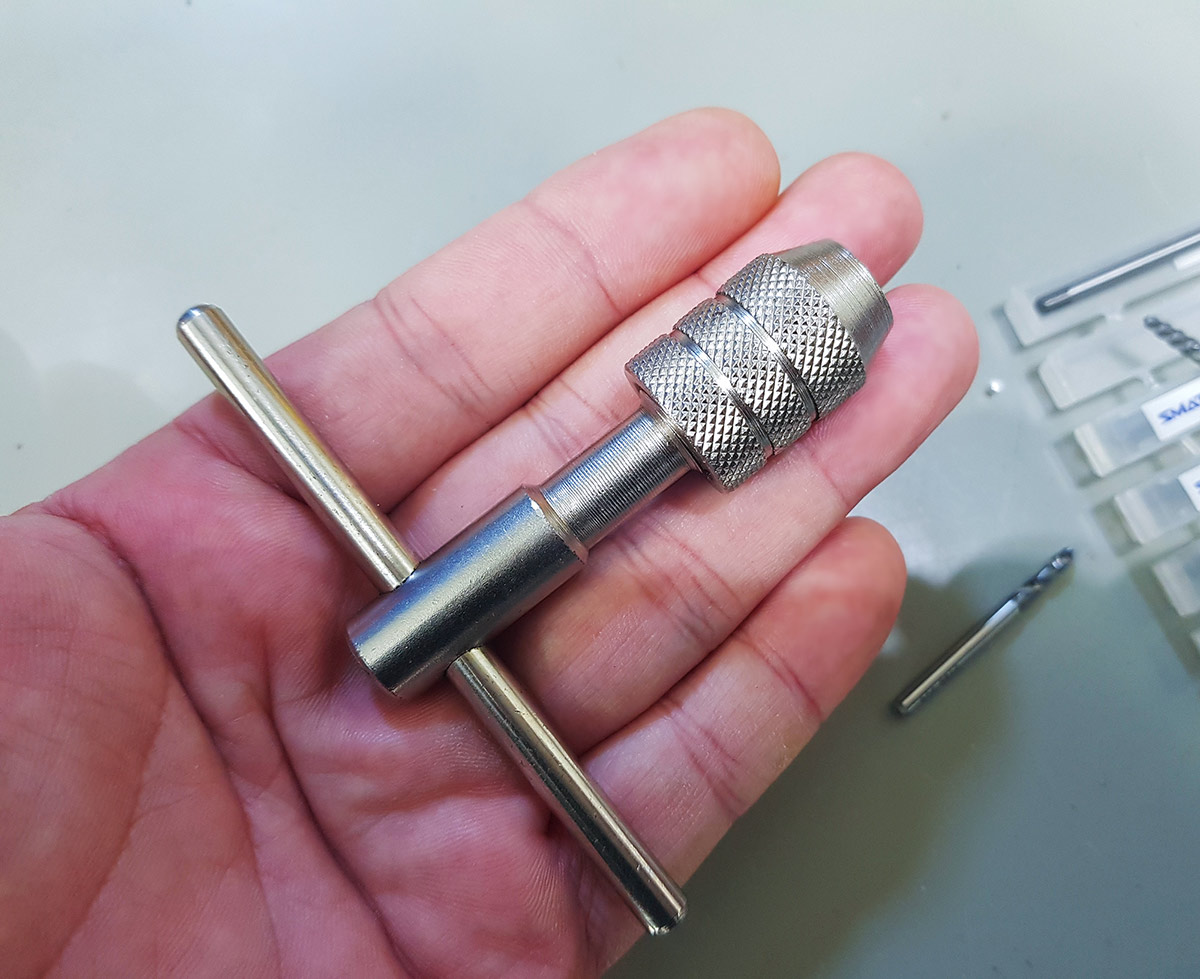
To use this, you’ll also need a Tap Handle to grip the extractor firmly.
Step-by-Step Removal Process
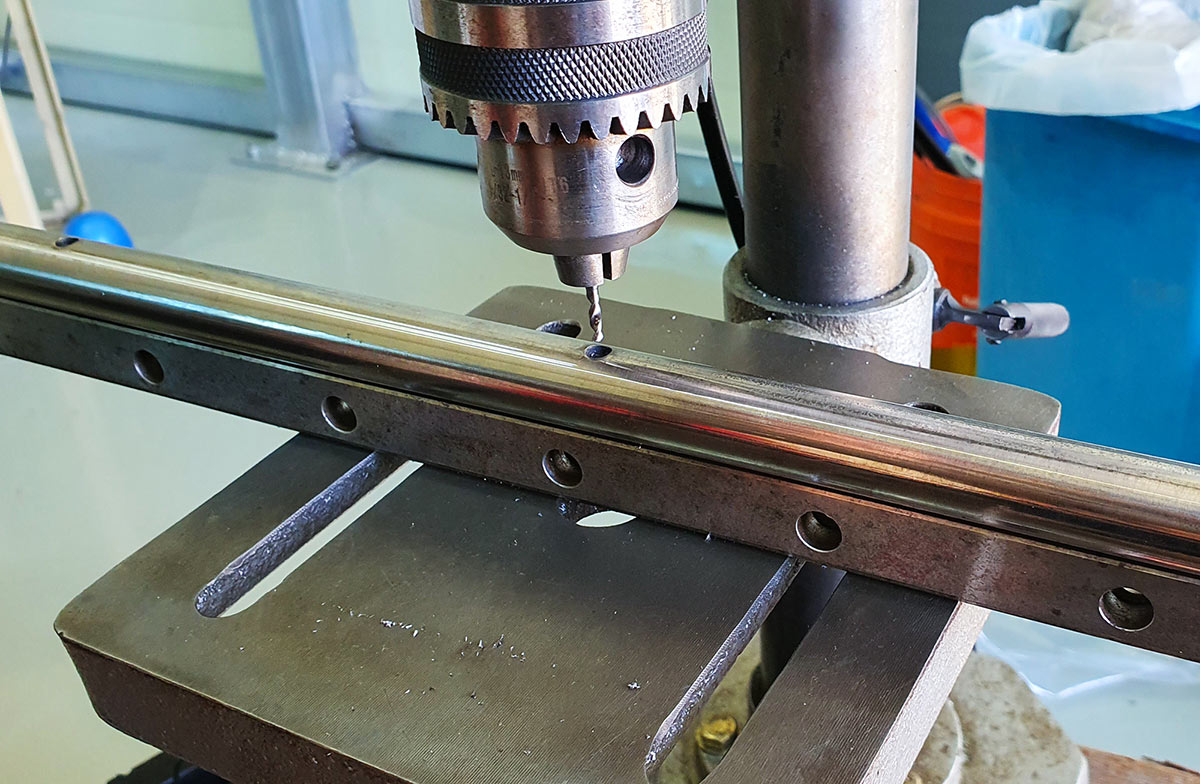
1. Preparation: Drilling with Carbide
You can’t just shove the extractor in. You need a pilot hole.
Since the bolt was tiny and likely hardened or tough, I used a 2.5mm Carbide Drill Bit (Solid Carbide). A standard HSS bit might struggle or wander, but carbide cuts through like butter.

2. The Extraction
The theory is simple.
- Drill a hole in the center of the broken bolt.
- Insert the Screw Extractor.
- Turn it Counter-Clockwise (Left).
- As the extractor bites into the bolt, the bolt should unscrew.
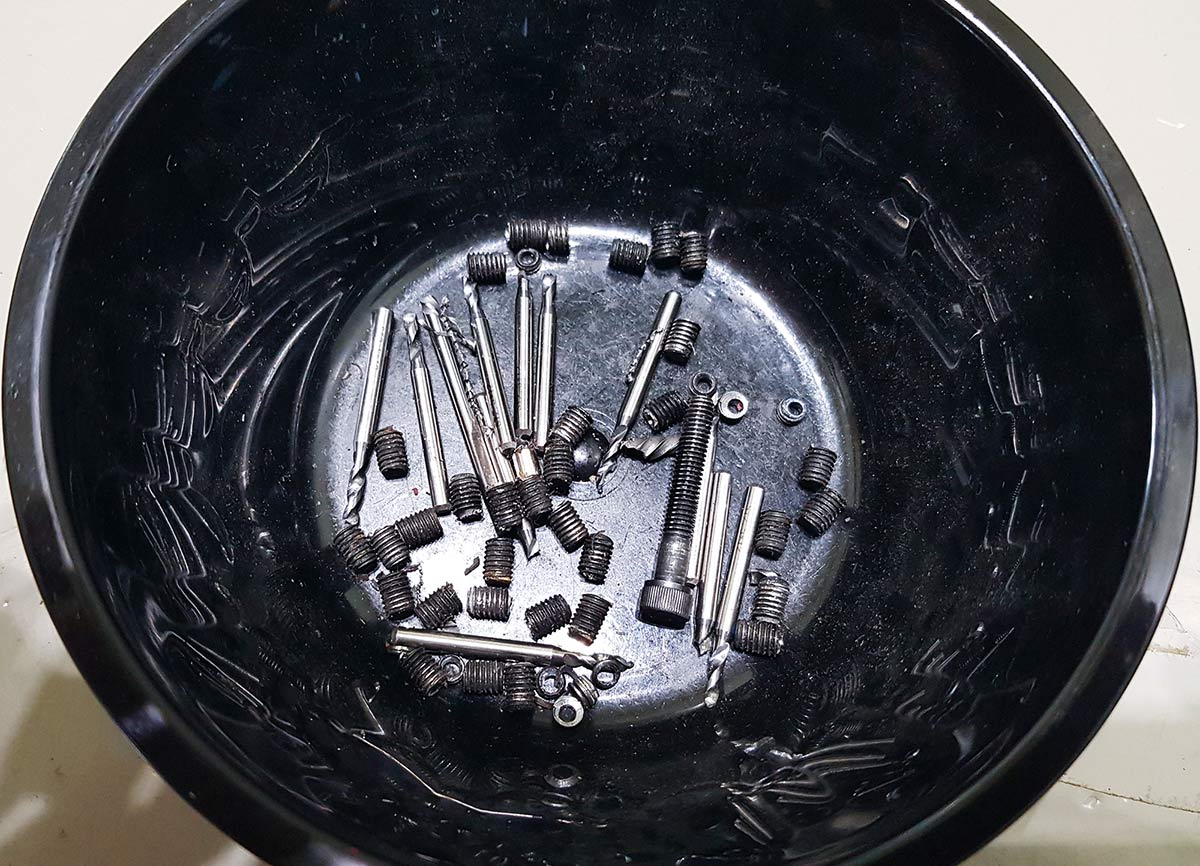
If successful, the extractor will grip the bolt, and it will come out attached to the tool like this:

Sounds easy, right? Well, reality is often disappointing.
To give you a better idea of the actual “feel” and the challenges involved, here is a video demonstration of the process.
The Secret Sauce: “The Finesse”
In photos or videos, it looks smooth. But if you try it, you’ll realize it’s a battle of nerves. Especially with thread locker applied, the bolt refuses to budge.
Here is the most critical tip: Control Your Force.
- Too weak? The extractor won’t bite and will just slip.
- Too strong? These extractors are hard but brittle. They will snap inside the bolt.
- Warning: If the extractor breaks inside, you are in a world of pain that makes the original problem look like a joke.
You need to treat it like a stubborn child—firm but gentle. It requires a specific “push and twist” feel that only comes with experience (and a few broken tools). It’s like a romantic “push-and-pull” relationship, but with cold steel.
After sacrificing a few tools and getting a massive headache from stress, I successfully extracted all 50+ broken bolts from the shafts.
Looking at this pile of scrap metal, it seems insignificant. But the sense of accomplishment? It’s surprisingly high.
If you are stuck with a broken bolt, take a deep breath, grab a carbide drill and an extractor, and remember: Patience is your best tool.