The Problem No One Else Seems to Care About
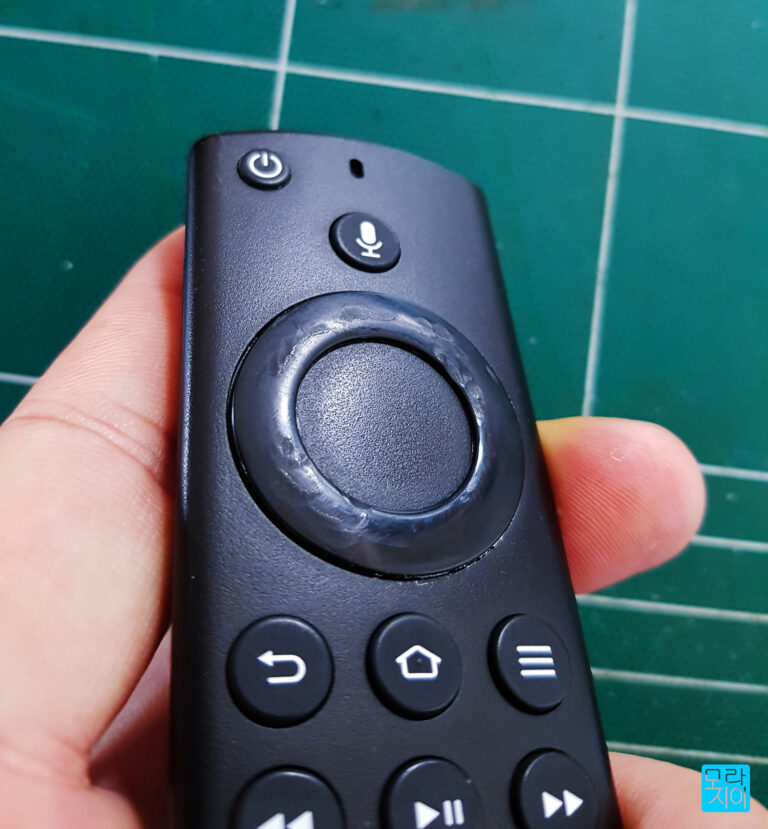
As a self-proclaimed “clumsy old technician,” I often find myself making custom servo motor cables. While the expensive crimpers for the signal pins are a necessary evil, I’ve always been annoyed by the tool for the cable shield.
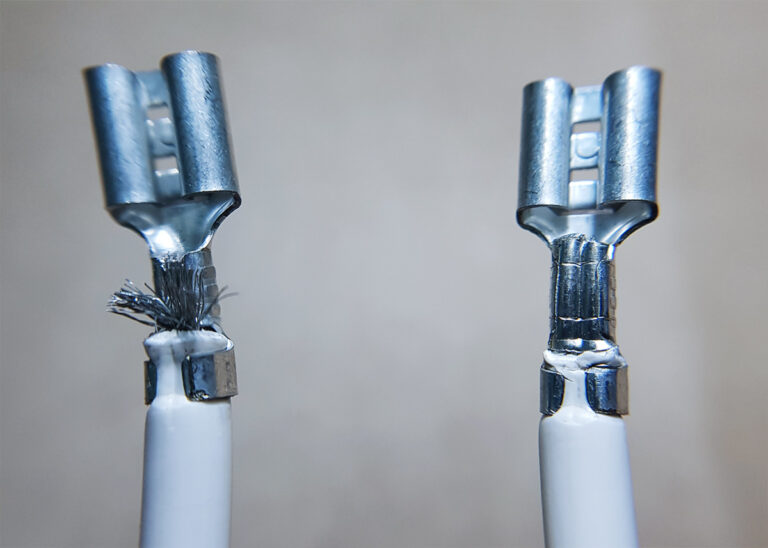
It’s a one-piece shield shell featuring an integrated crimp barrel. This barrel is crimped directly onto the cable’s shield, and the entire shell provides the grounding path through the connector. But when you use a standard coaxial or other crimper, the result is often a hexagonal, lopsided mess.
Most people don’t care. It’s a part that gets hidden inside the connector housing anyway. But it just doesn’t sit right with me. Frankly, it looks like a job done by an amateur. As a technician, that’s a compromise I’m not willing to make, even for a part that gets hidden away.
So, I decided to make my own tool. As I always say, “If you can’t find it, build it. And if you can, make it cheap and good.”
The Raw Material: The Humble “End Nipper”
If you walk onto any construction site or into a seasoned woodworker’s shop, you’ll probably find this tool lying around. It’s a common workhorse, an End Nipper. Its official job is often cutting wire and pulling out stubborn nails, but I’ve found it surprisingly useful for other tasks, like The Pro Trick for Removing a Stuck Parallel Key.
But today, we’re giving it a whole new purpose.
The Modification: A Step-by-Step Guide to Grunt Work
If you have a bit of skill with your hands, the process isn’t too difficult. It just requires a bit of patience and what I call sapjil (a Korean term for pointless, hard shoveling).
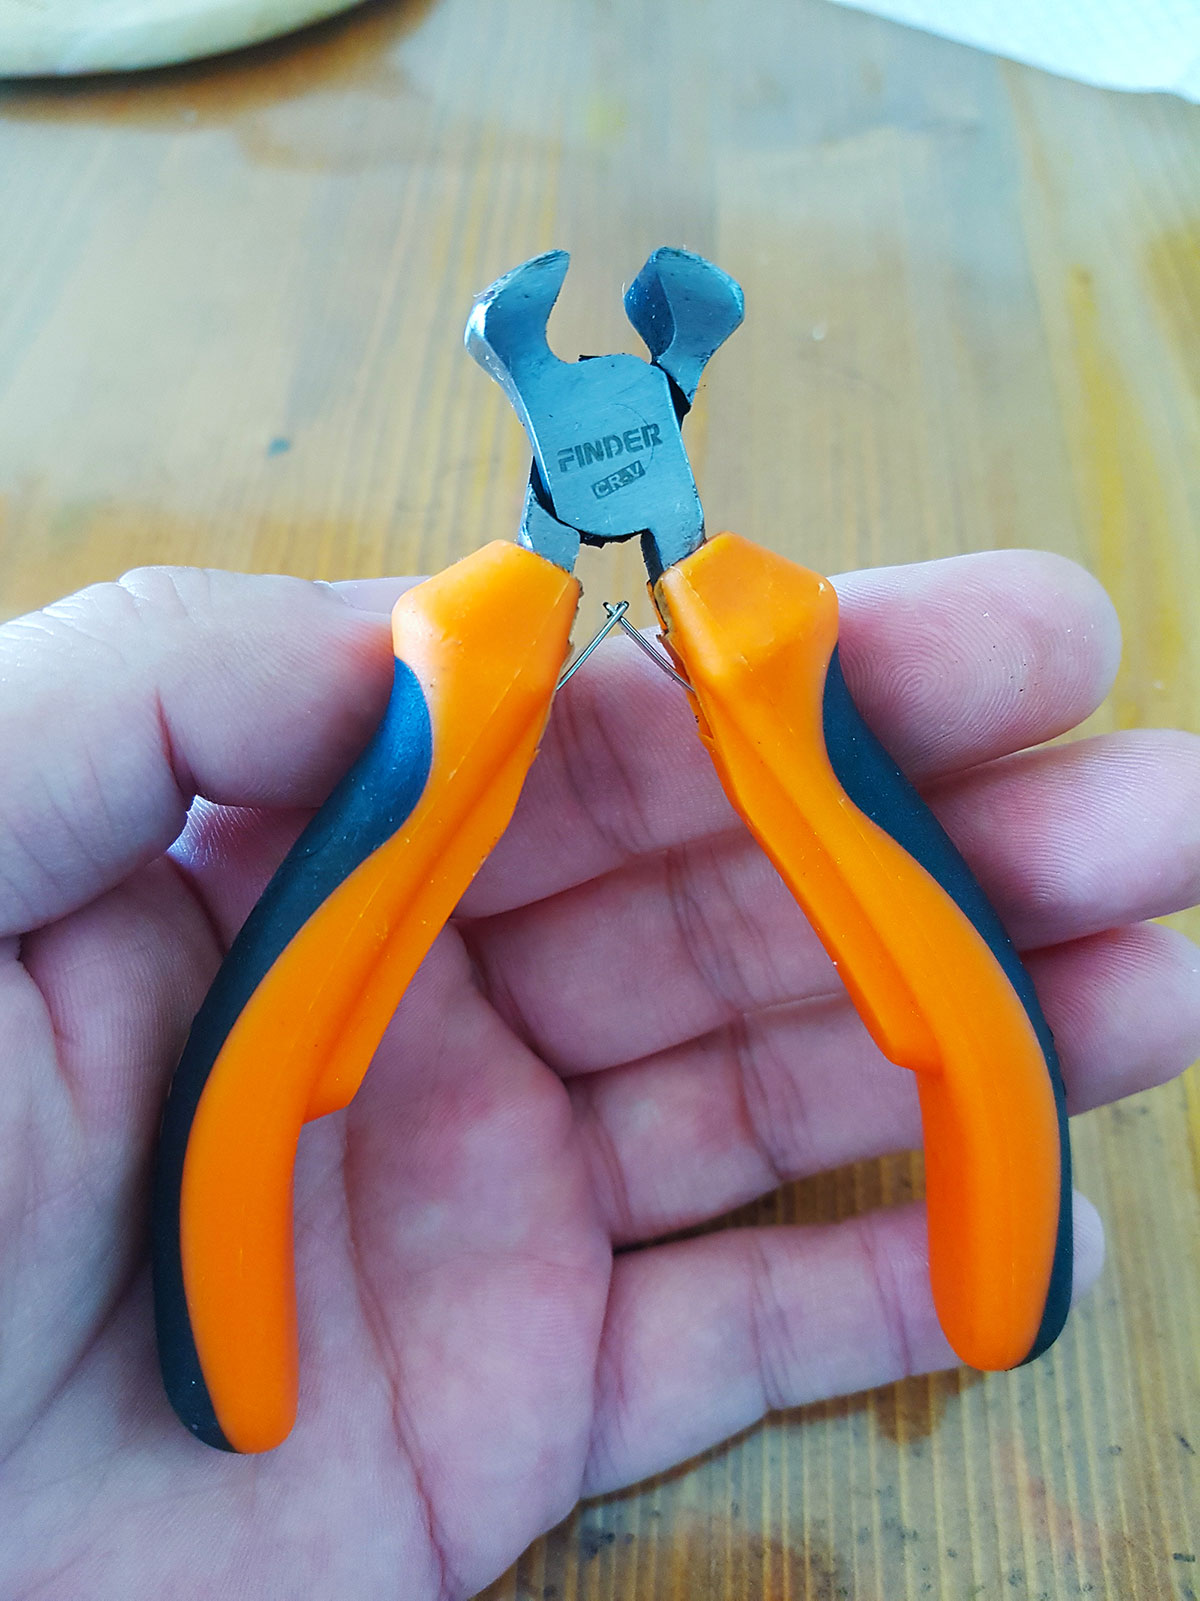
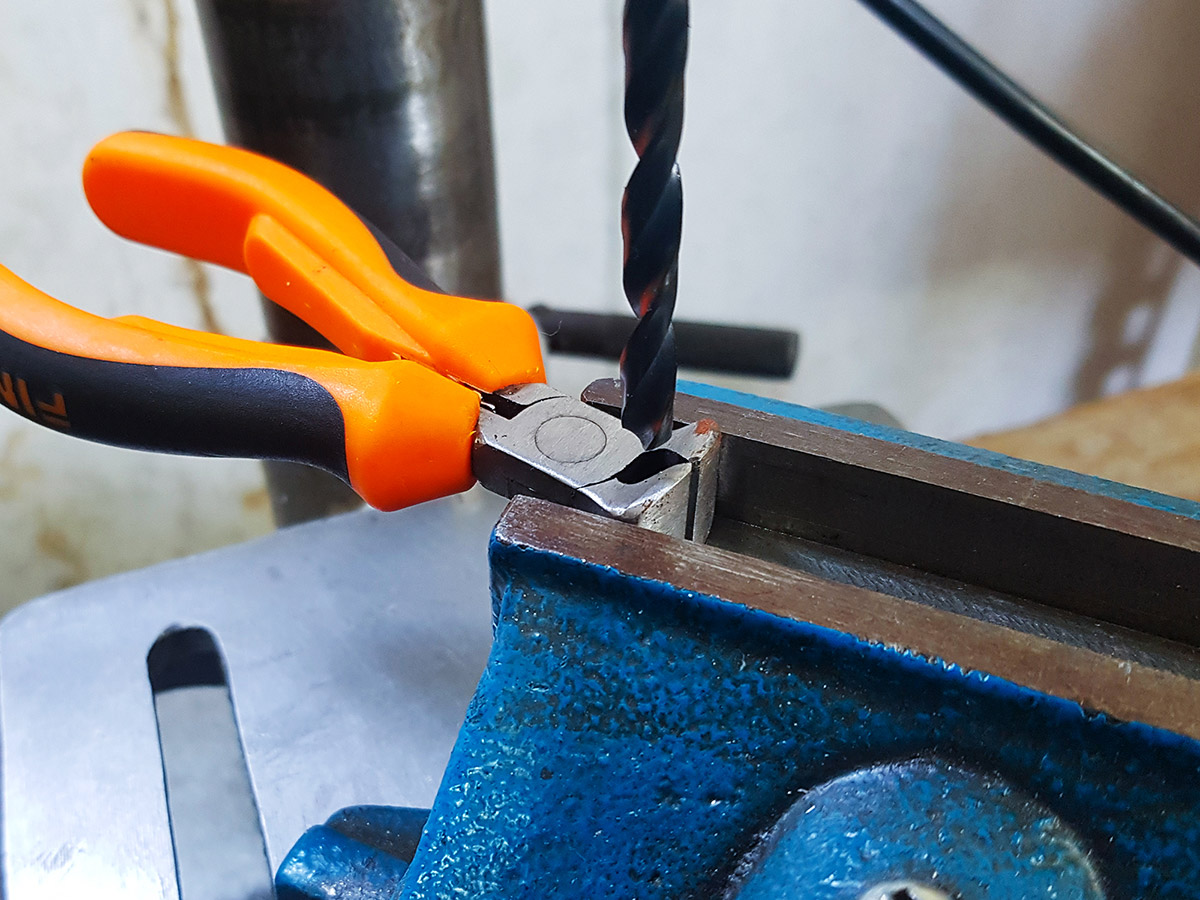
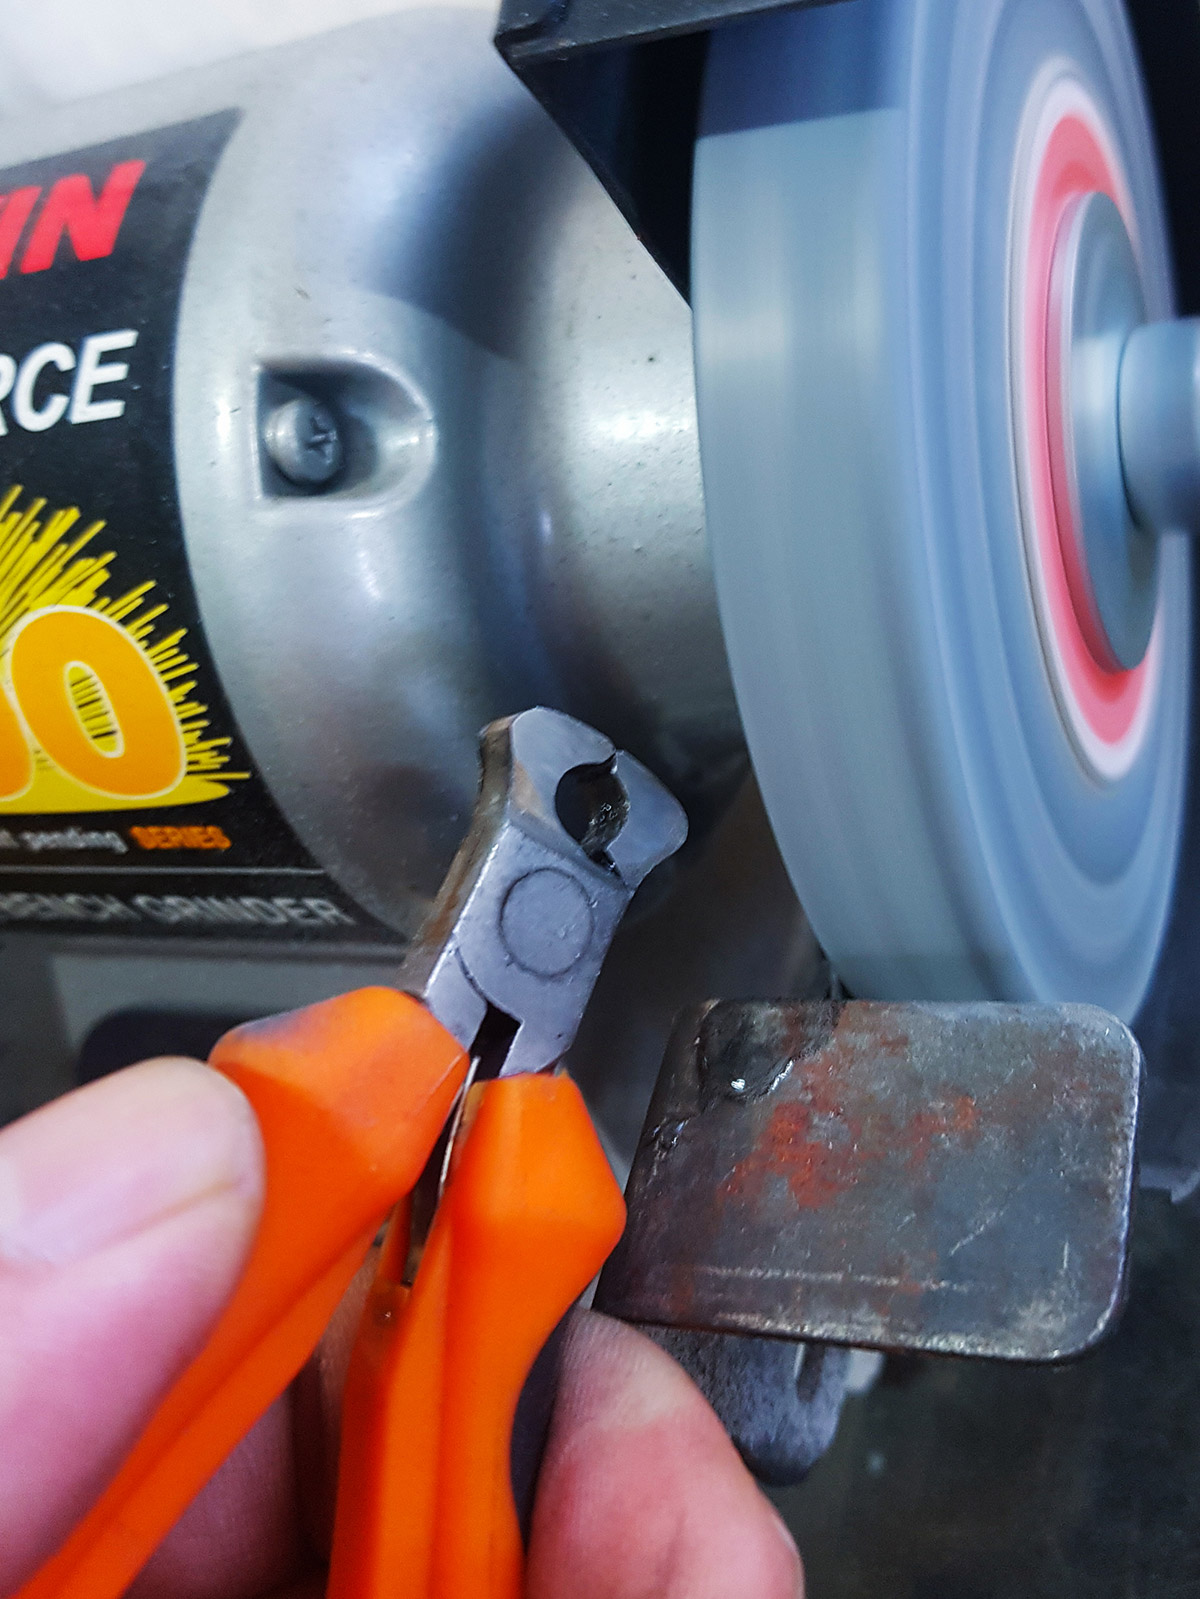
Step 1: Drilling a New Hole. The first real step is to use a drill bit of the appropriate diameter to create a perfect, clean circular groove. The original hole was a messy, misshapen teardrop that was useless for a clean crimp.
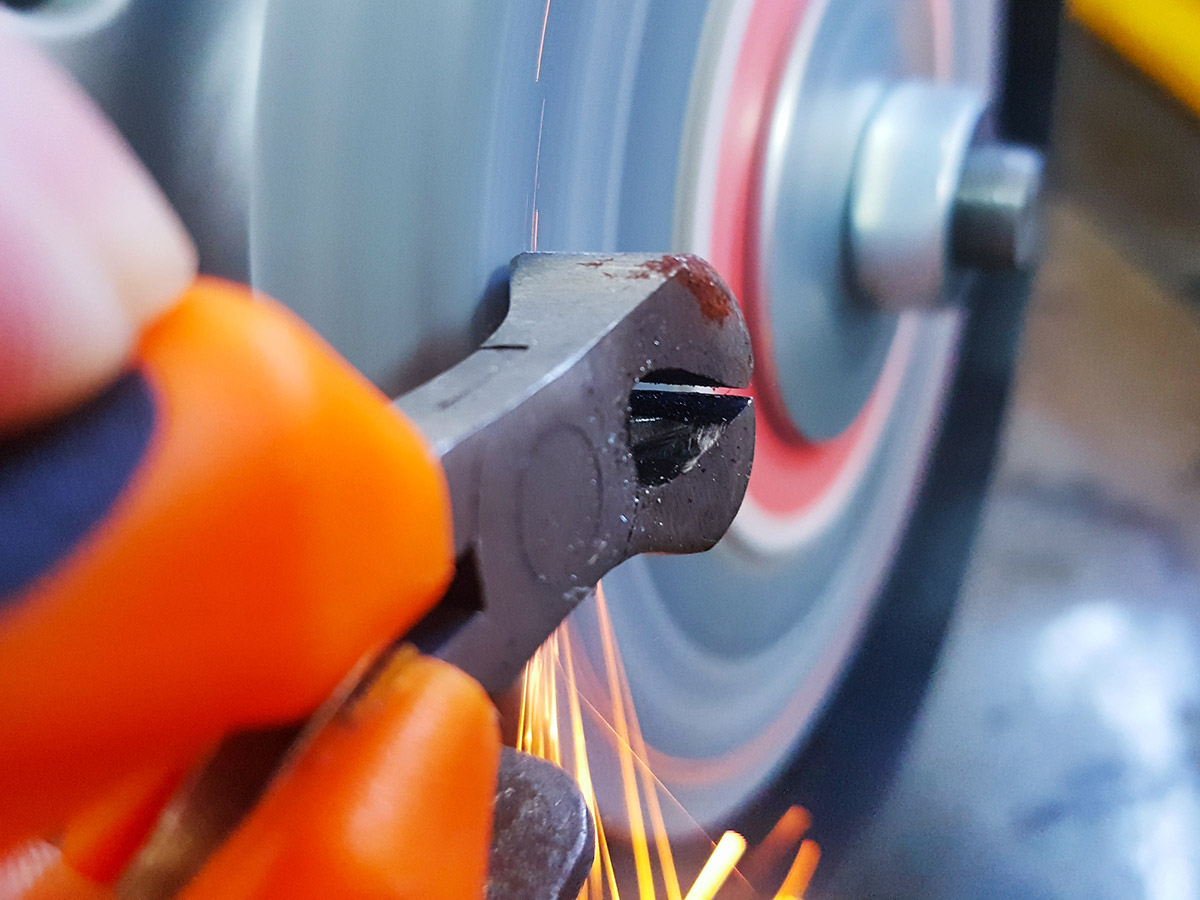
Step 2: Rough Shaping. Using a bench grinder, I roughly removed the protruding parts of the jaws.
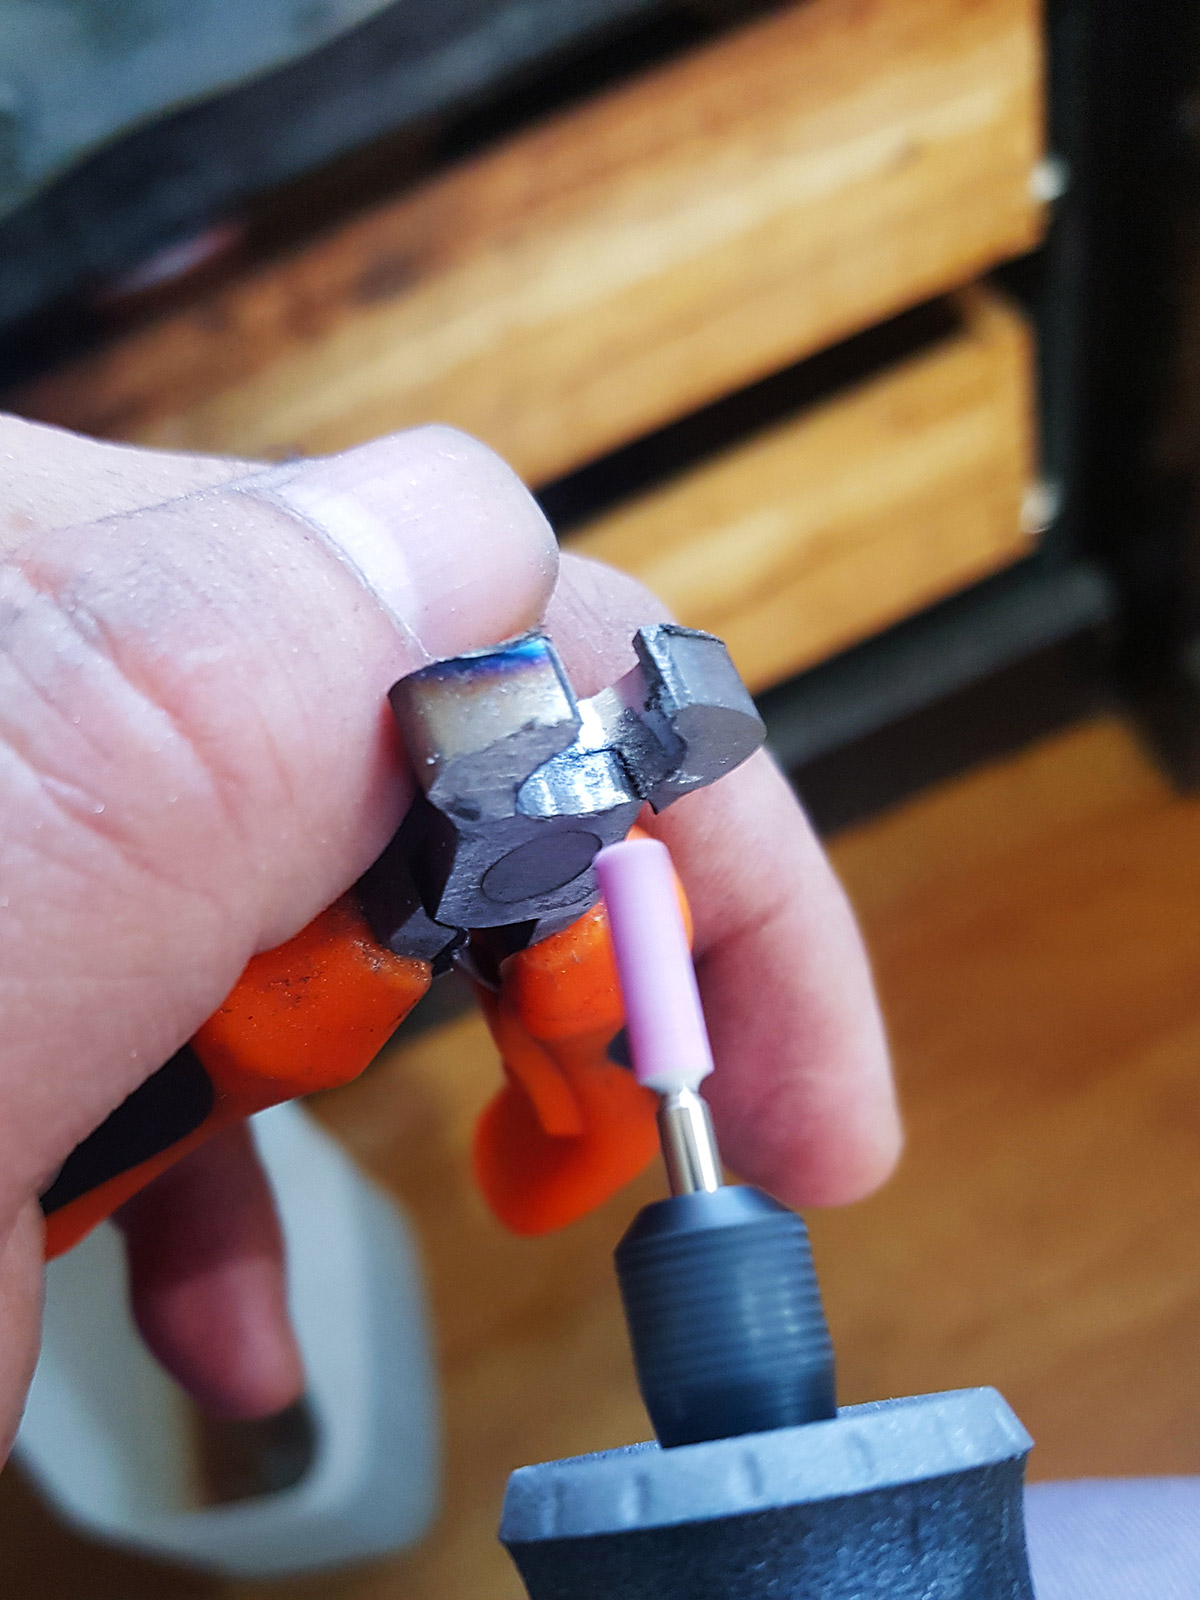
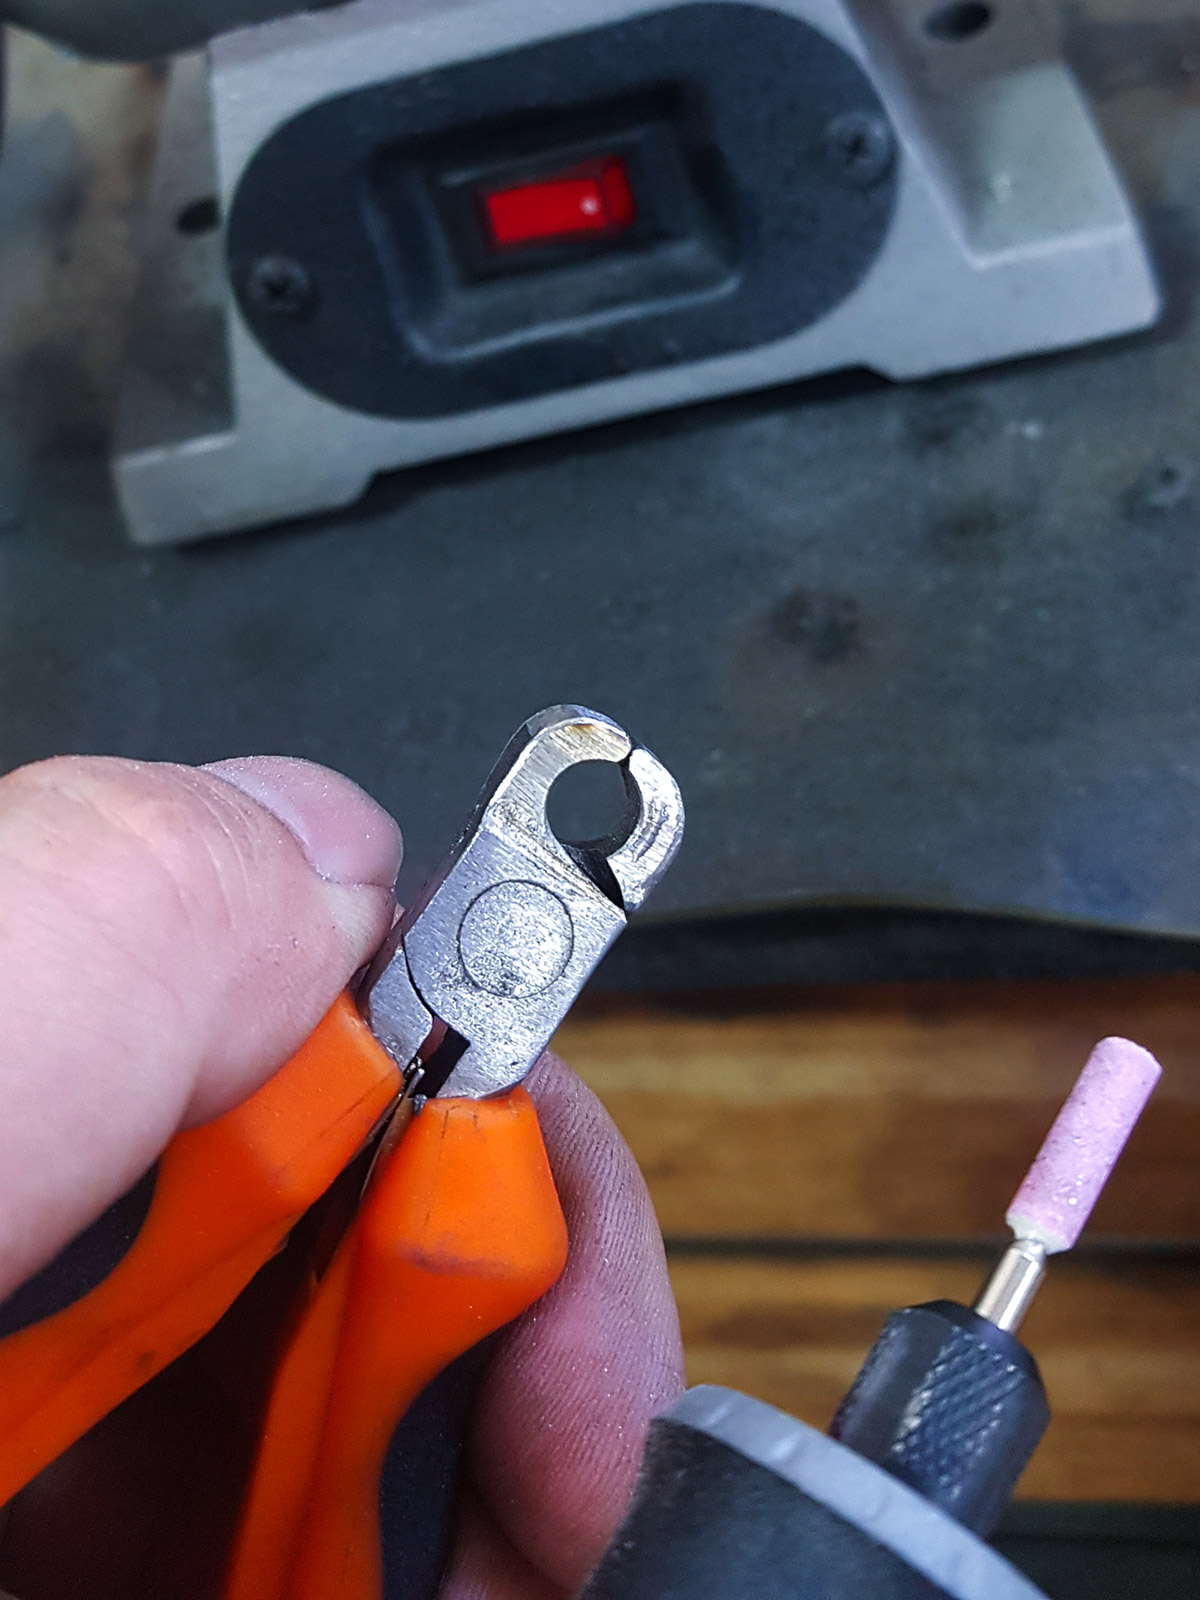
Step 3: Refining the Groove. A Dremel tool is perfect for smoothing and refining the new groove to a clean finish.
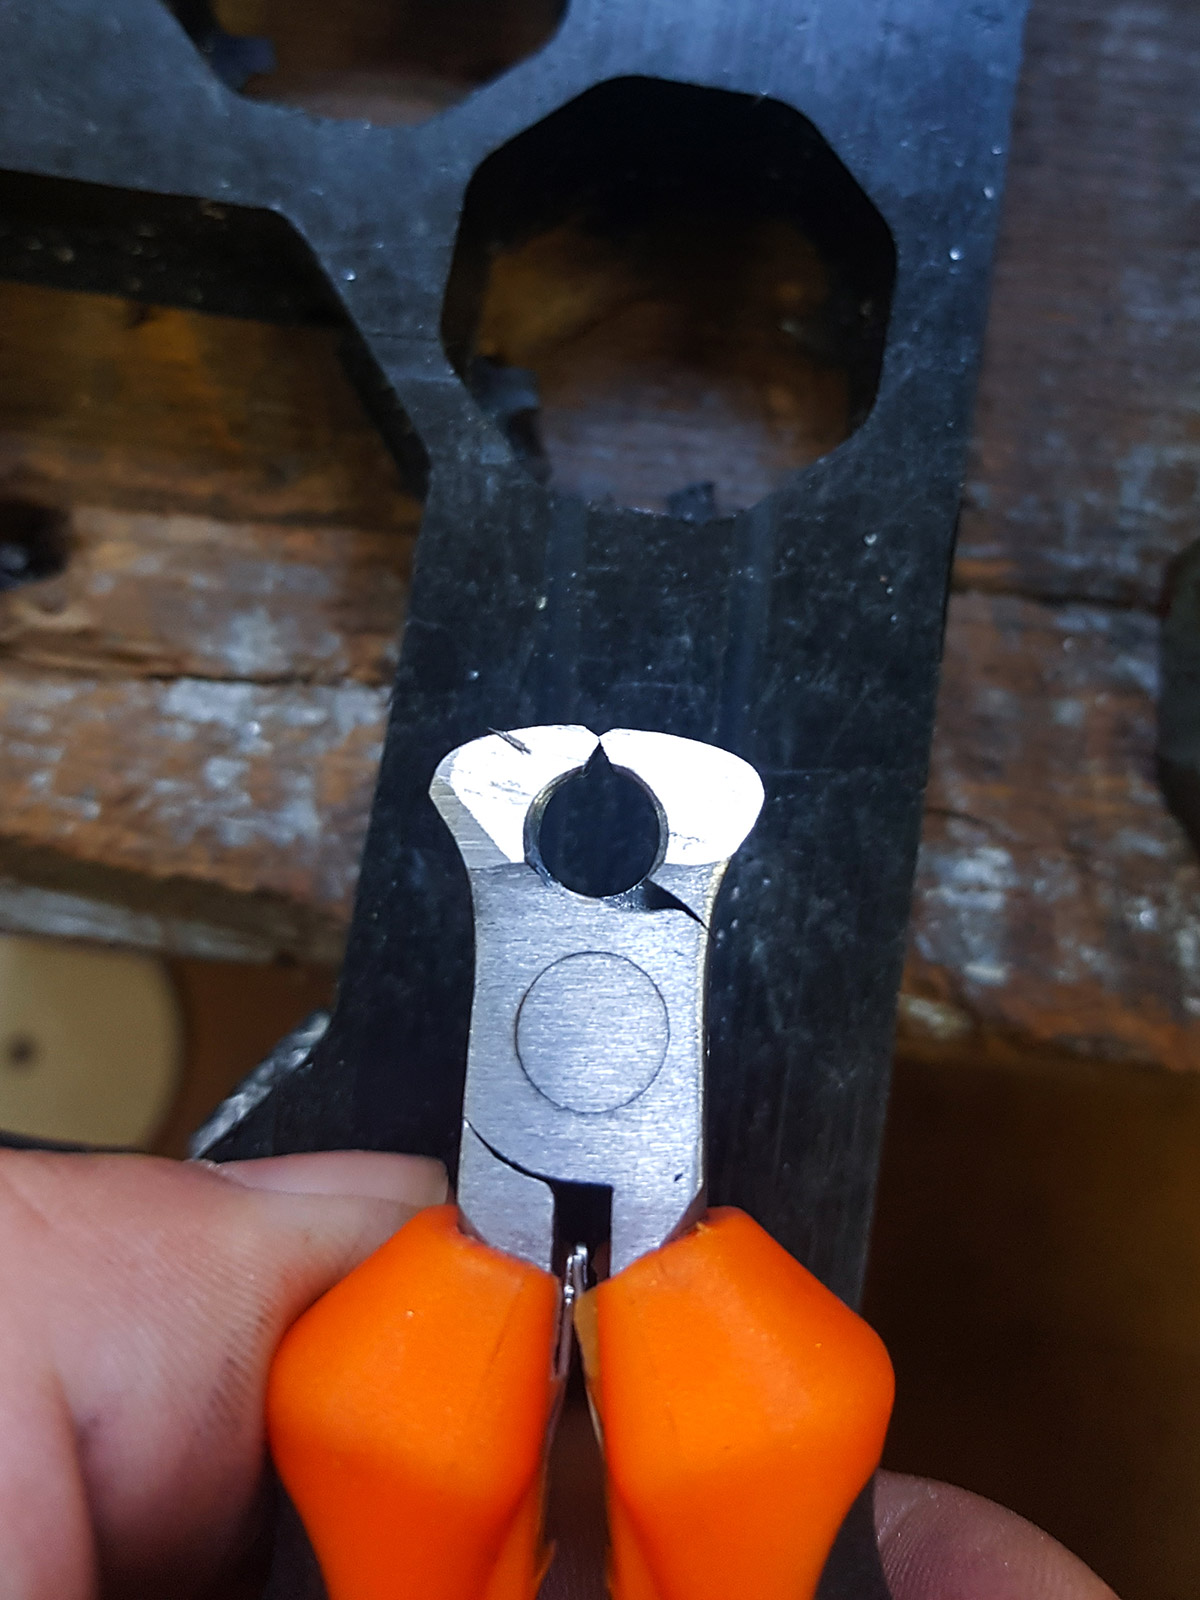
Step 4: Removing Unnecessary Parts. I ground off the side protrusions, which are used as a lever for pulling nails. For a crimper, they just get in the way.
Step 5: Final Cleanup. I finished by removing all the burrs and giving it a final cleanup. It’s not for sale, just for my own use, so this level of finish is more than enough. It’s done!
For those who prefer to see it in action, here’s a short video of the process.
The Result: Was It Worth It?
Now for the real test. I used a discarded component for this.
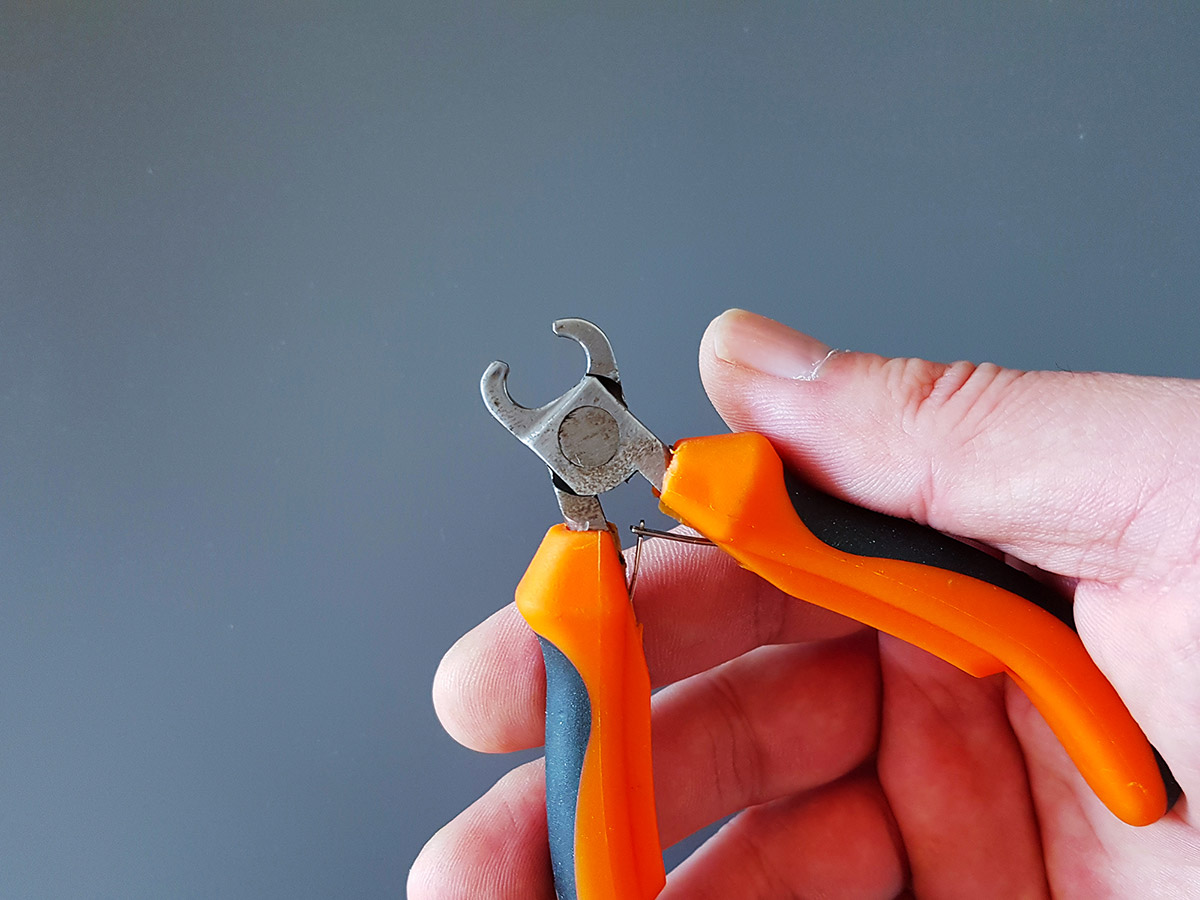
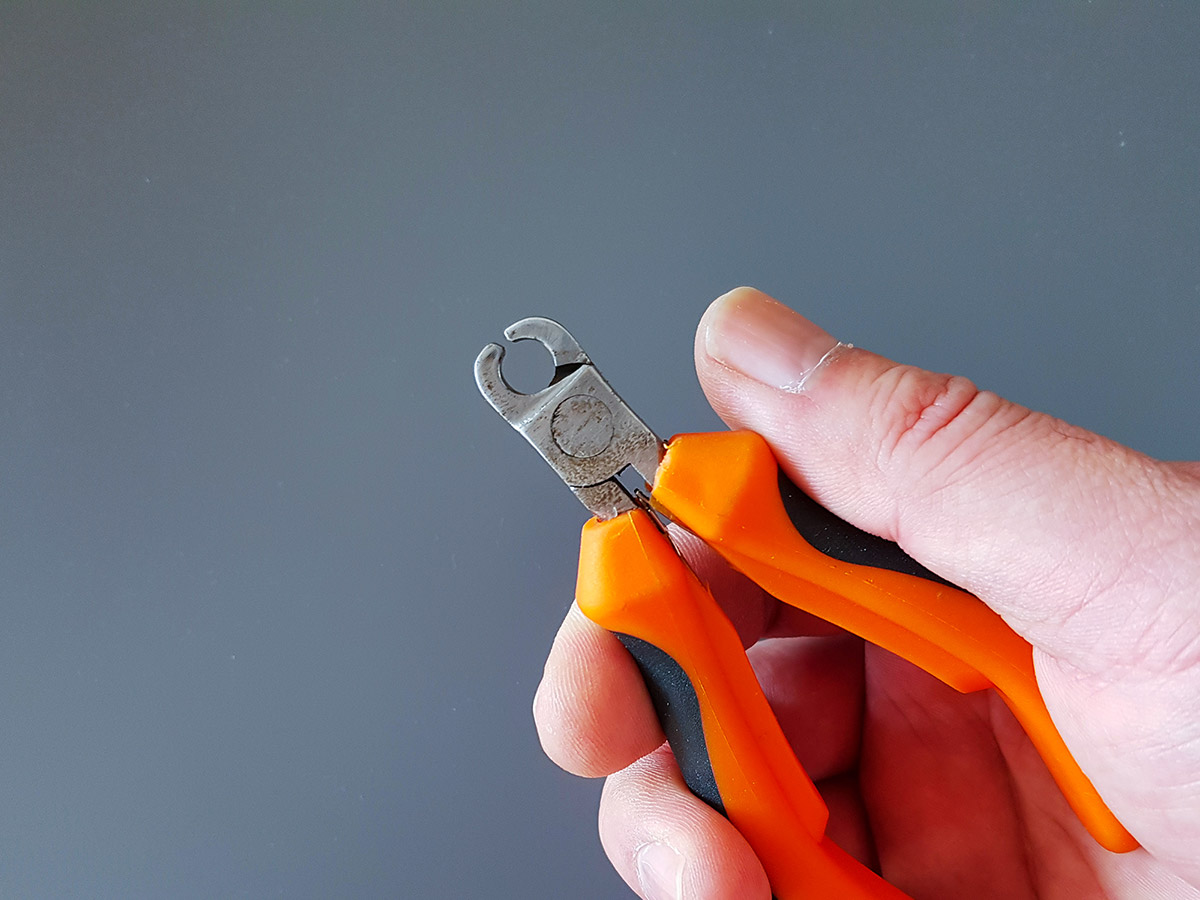
Here’s the completed tool, ready for action.
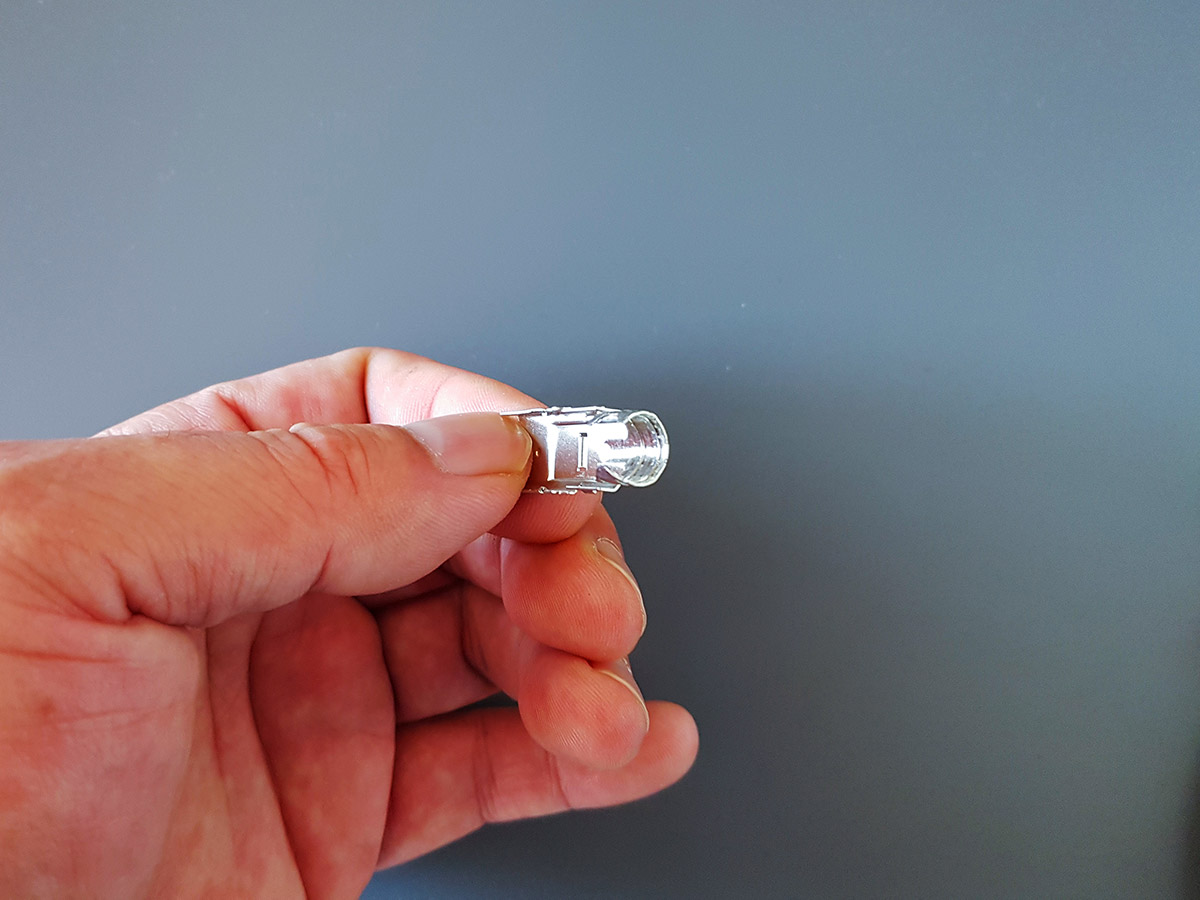
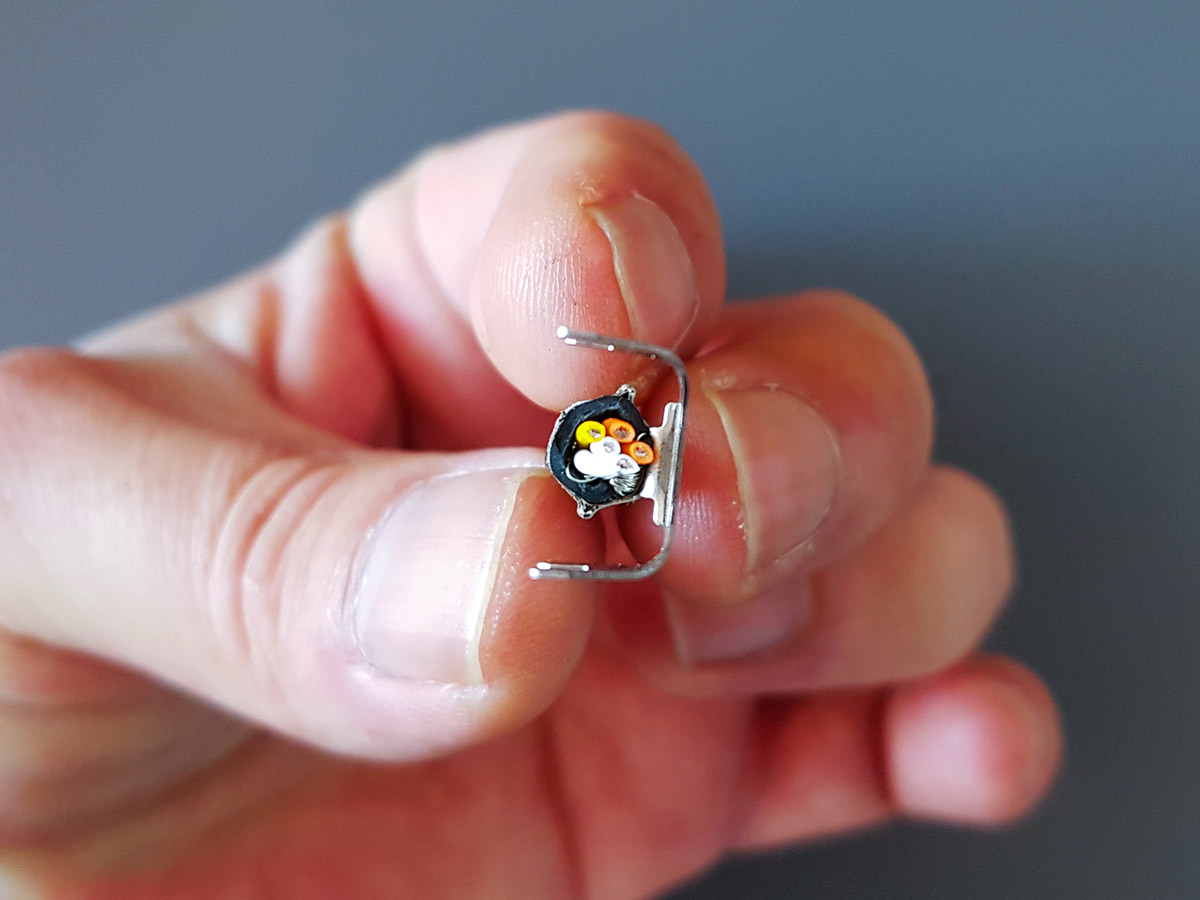
First, let’s look at the original shield barrel before any crimping. See how it’s designed to be perfectly round?
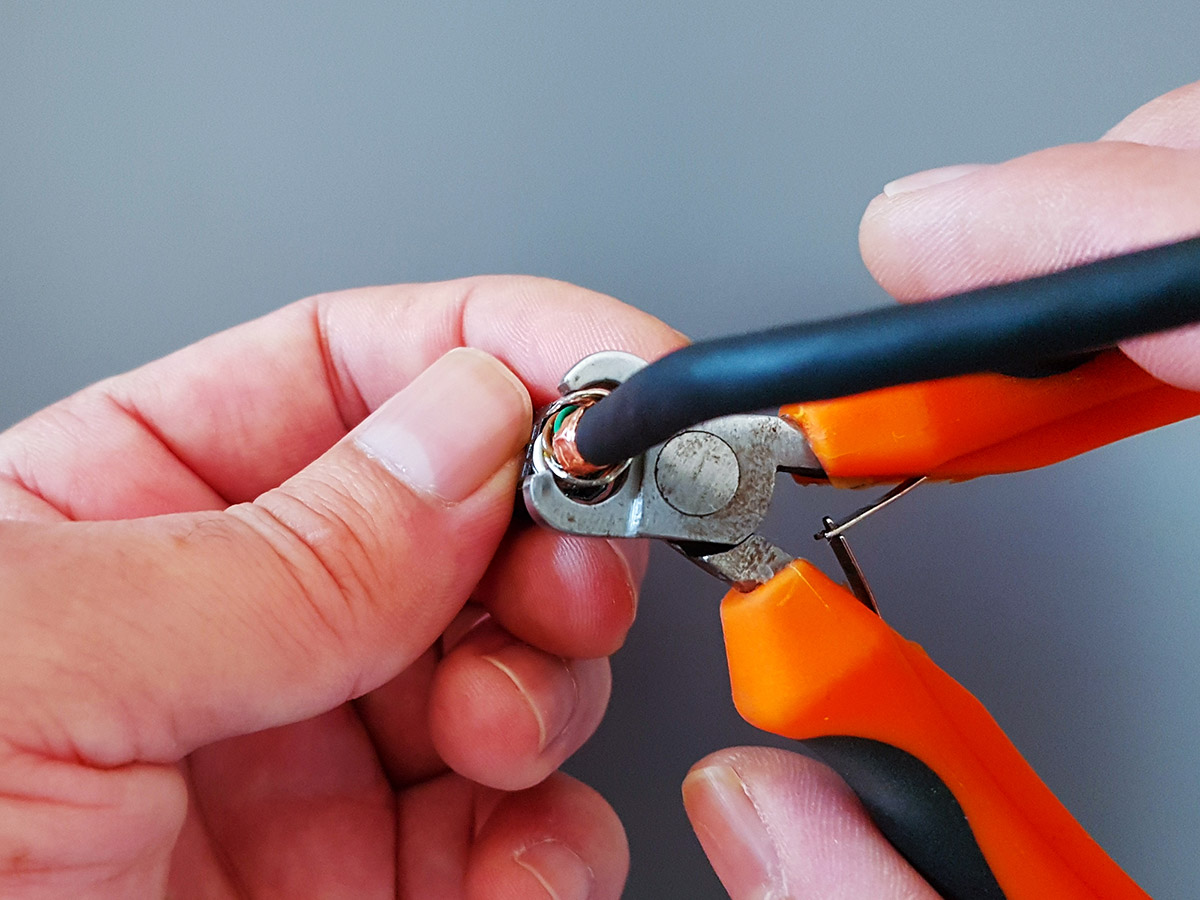
Now, the modified tool begins its work.
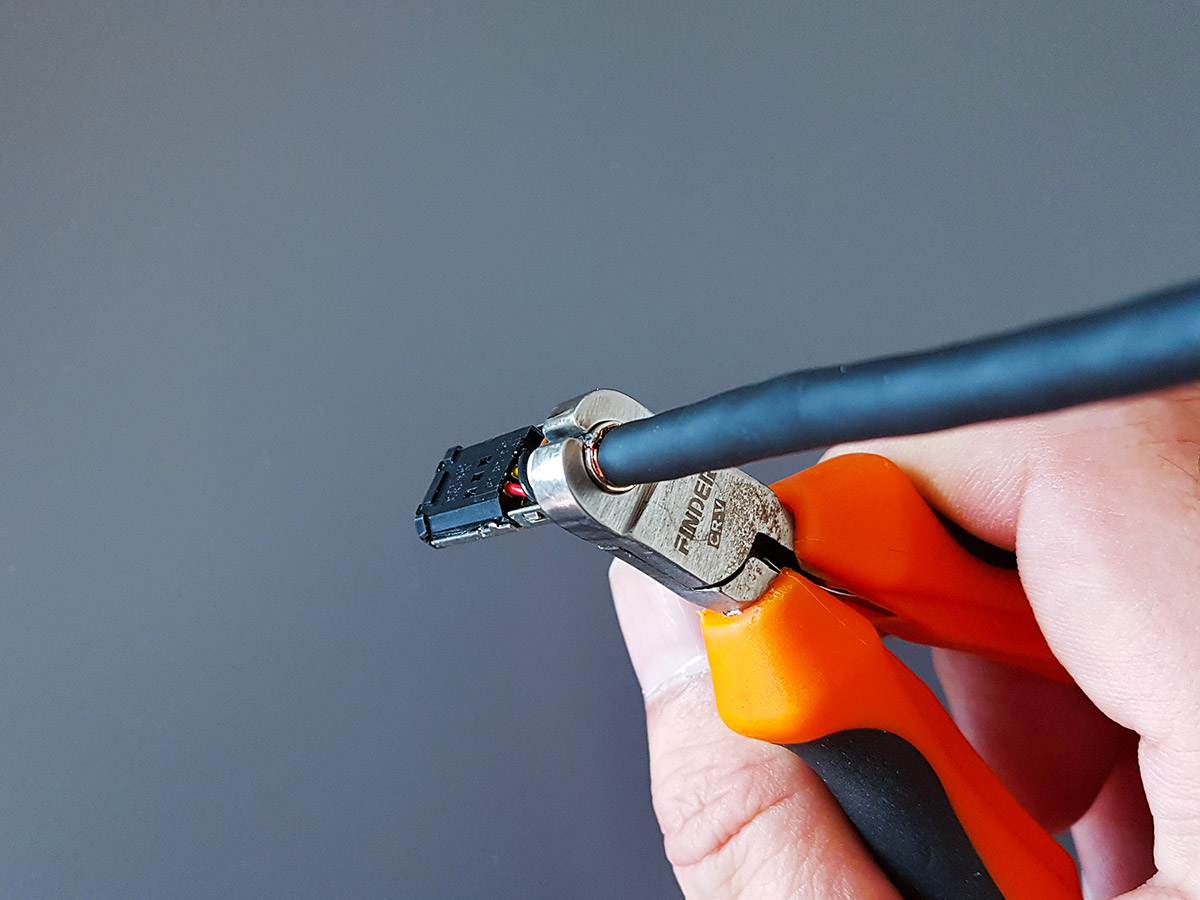
Applying full pressure to form a perfect circular crimp.
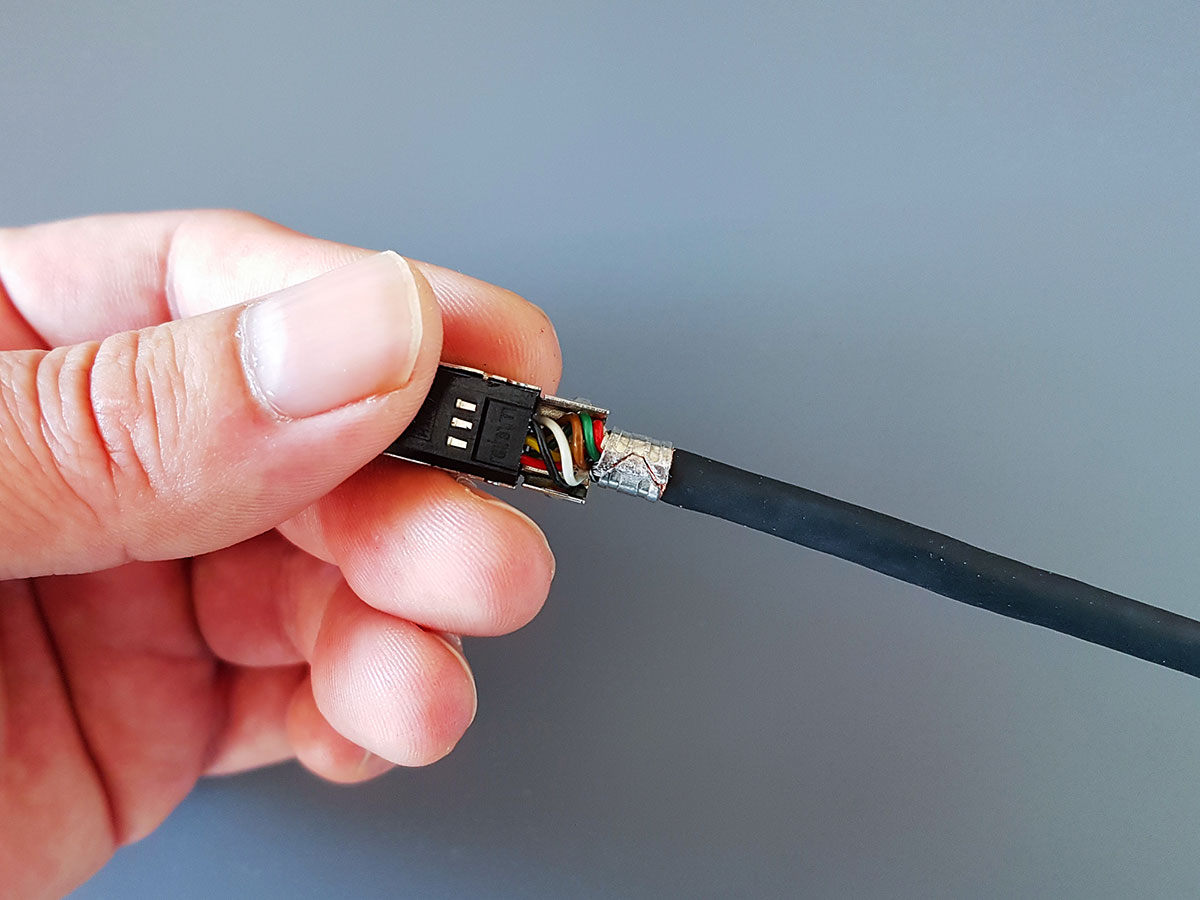
As you can see, there are no sharp edges or protrusions. The barrel is secured in a perfect circle. A perfectly round crimp provides better 360-degree contact for electrical shielding and has no sharp edges that could damage other wires inside the connector.
It may be a subjective evaluation, but I think the result is better than I expected. Compared to other general-purpose coaxial crimpers, this custom tool is lighter, easier to use, and the result is much cleaner.
It’s not my favorite type of work, but every time I have to make a servo cable, this little guy proves its worth. This is exactly the kind of simple, effective tool hack I love. If you have a similar need, I highly recommend you try making one.