Why bother making your own cables?
Flat ribbon cables with IDC connectors are everywhere in the world of electronics—inside computers, CNC machines, 3D printers, you name it. Most of the time, they come bundled with the products, and you just plug them in. But every so often, a project comes along—a repair, a prototype, or a custom build—where you need a cable that’s just a little longer, a little shorter, or has a different connector configuration.
That’s when knowing how to make your own goes from a niche skill to a project-saving superpower. The good news? It’s incredibly fast and simple, as long as you know the one golden rule.
For those who prefer to watch rather than read, here’s a video that covers the entire process.
Tools and Materials
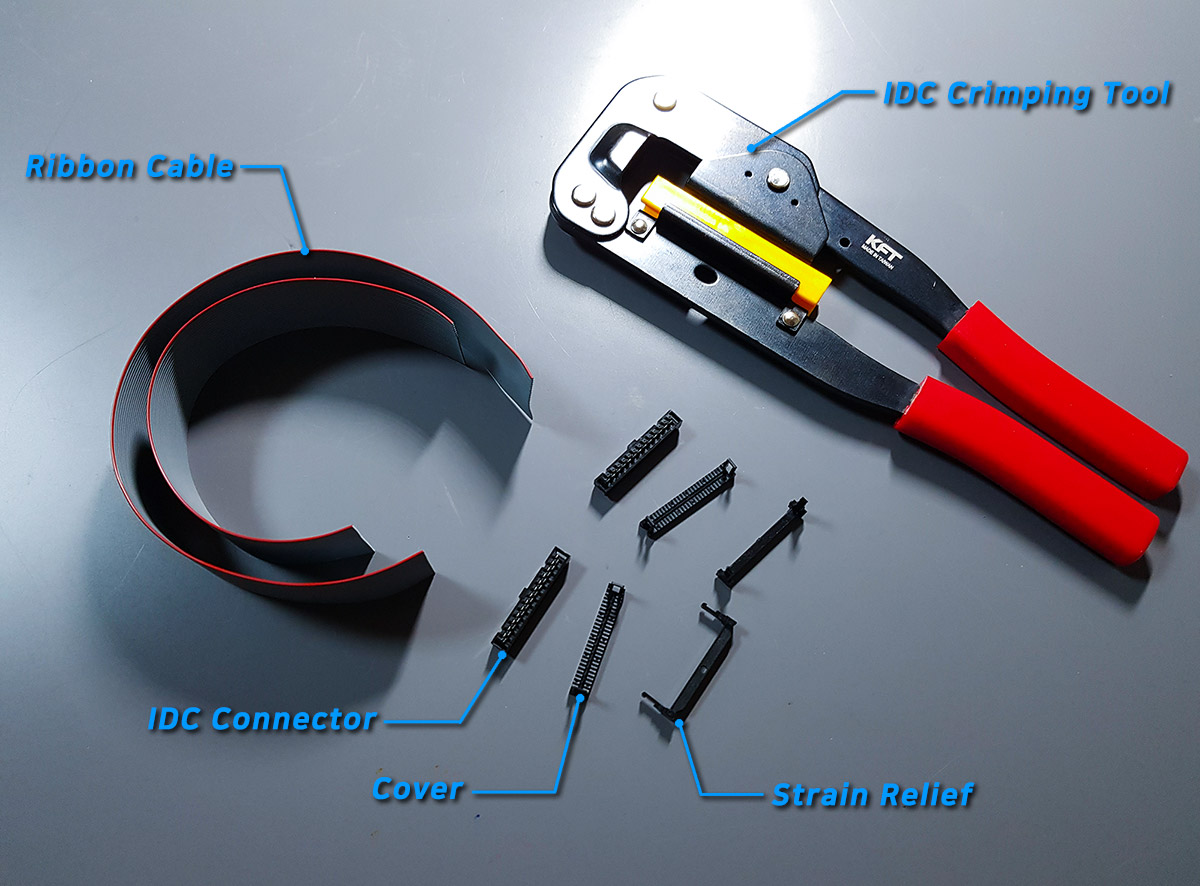
Here’s what you’ll need:
- Flat Ribbon Cable: Get the type with the correct number of wires for your project. The process is identical for any size.
- IDC Connectors: These usually come in two main parts: the main body and the locking cover.
- (Optional) Strain Relief: This little clip helps prevent the cable from being pulled out of the connector. Highly recommended for any cable that will be handled frequently.
- IDC Crimping Tool: This is the “proper” tool for the job. You can get one for around $10-15, and it’s a worthy addition to any electronics workbench. If you don’t have one, a bench vise or a press that can apply even pressure across the connector will also work in a pinch.
The Golden Rule: Pin 1 Alignment
If you ignore everything else in this guide, remember this one part. 99% of all mistakes happen here. To ensure your cable works, you must match Wire 1 on the cable with Pin 1 on the connector.
Luckily, this is made incredibly easy by global standards.
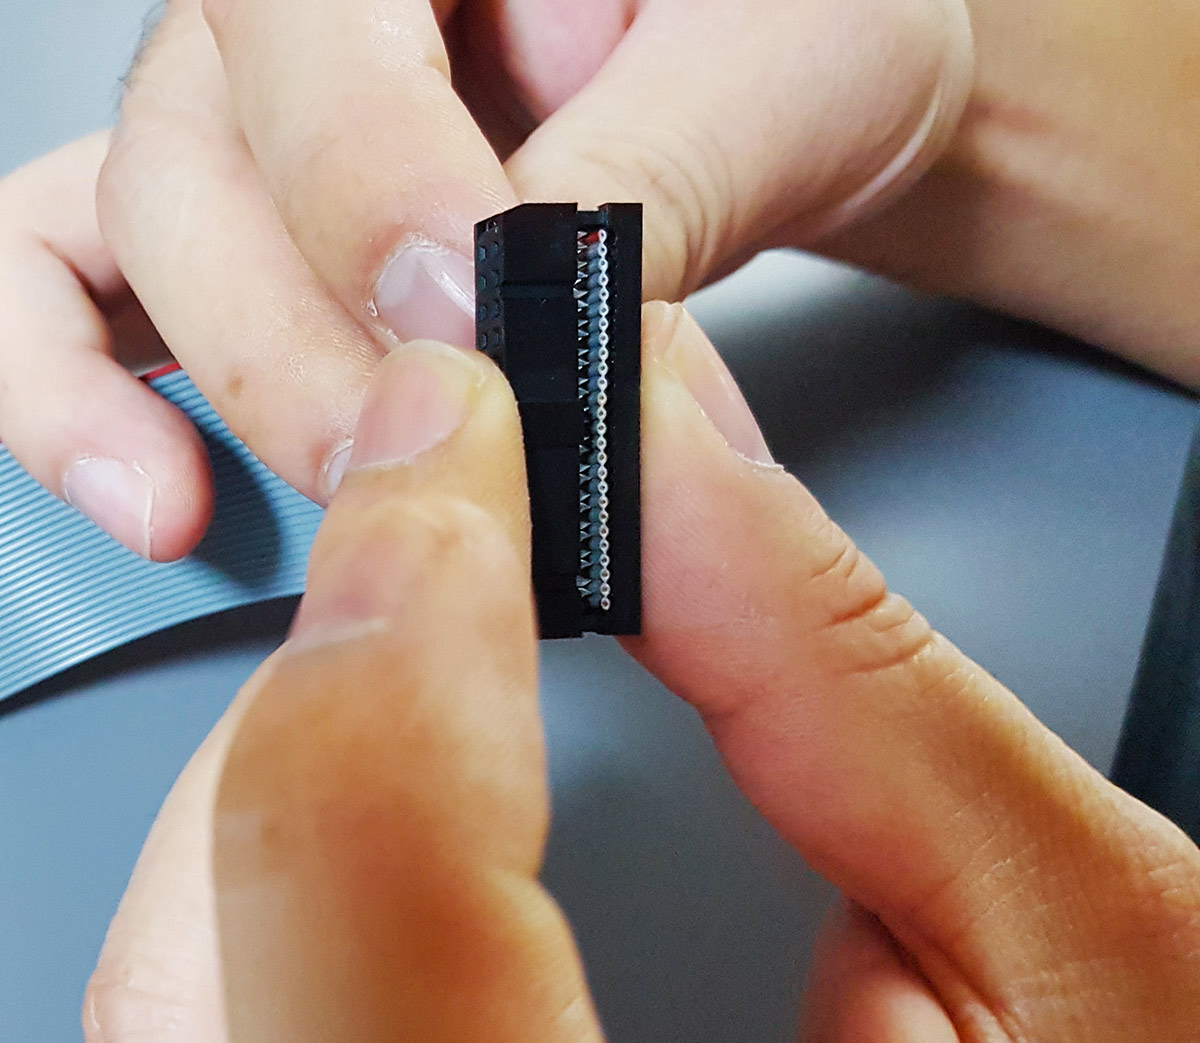
First, Wire 1 on most gray ribbon cables is marked with a red stripe. This is your universal guide. (On rainbow-colored cables, the brown wire is Wire 1, following the resistor color code.)
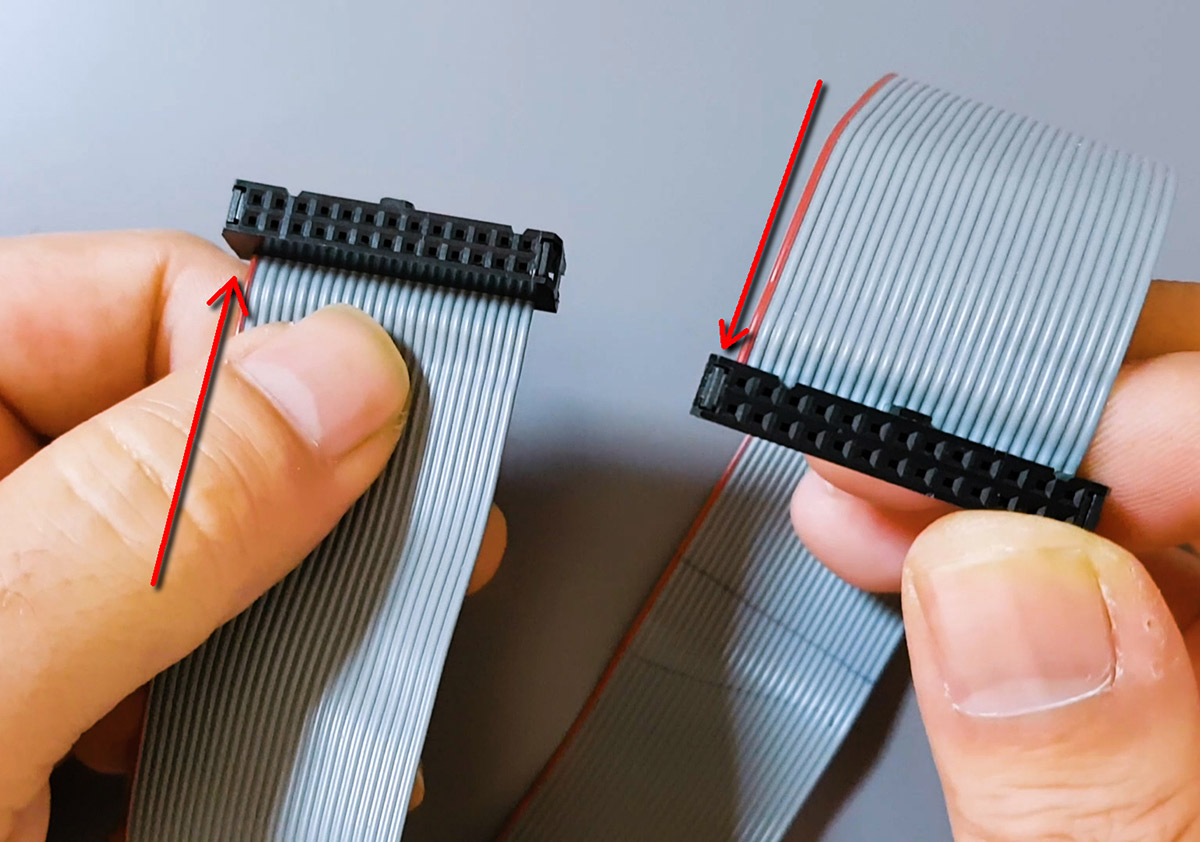
Next, the IDC connector has two features to guide you. The first is a small triangle symbol (▼) that explicitly marks the side for Pin 1. You’ll also notice a raised bump or ‘key’ on one side of the connector body. The triangle is always on the same side as this key. This key also ensures you can only plug the finished cable in one way, so it’s a critical feature for both building and using the cable.

So the final rule is simple: On the side of the connector that has the key, align the red-striped wire (Wire 1) directly over the triangle mark (Pin 1). That’s it. That’s the whole secret.
Let’s Build It: Step-by-Step
Once you’ve mastered the golden rule, the rest is just simple mechanical assembly.
Step 1: Position the Cable
Place the ribbon cable between the connector body and the cover. Make sure Wire 1 (the red stripe) is aligned with the Pin 1 (▼) mark. A useful tip is to gently press the cover down with your fingers. It will lightly grip the cable, holding it in place so it doesn’t shift around before crimping.
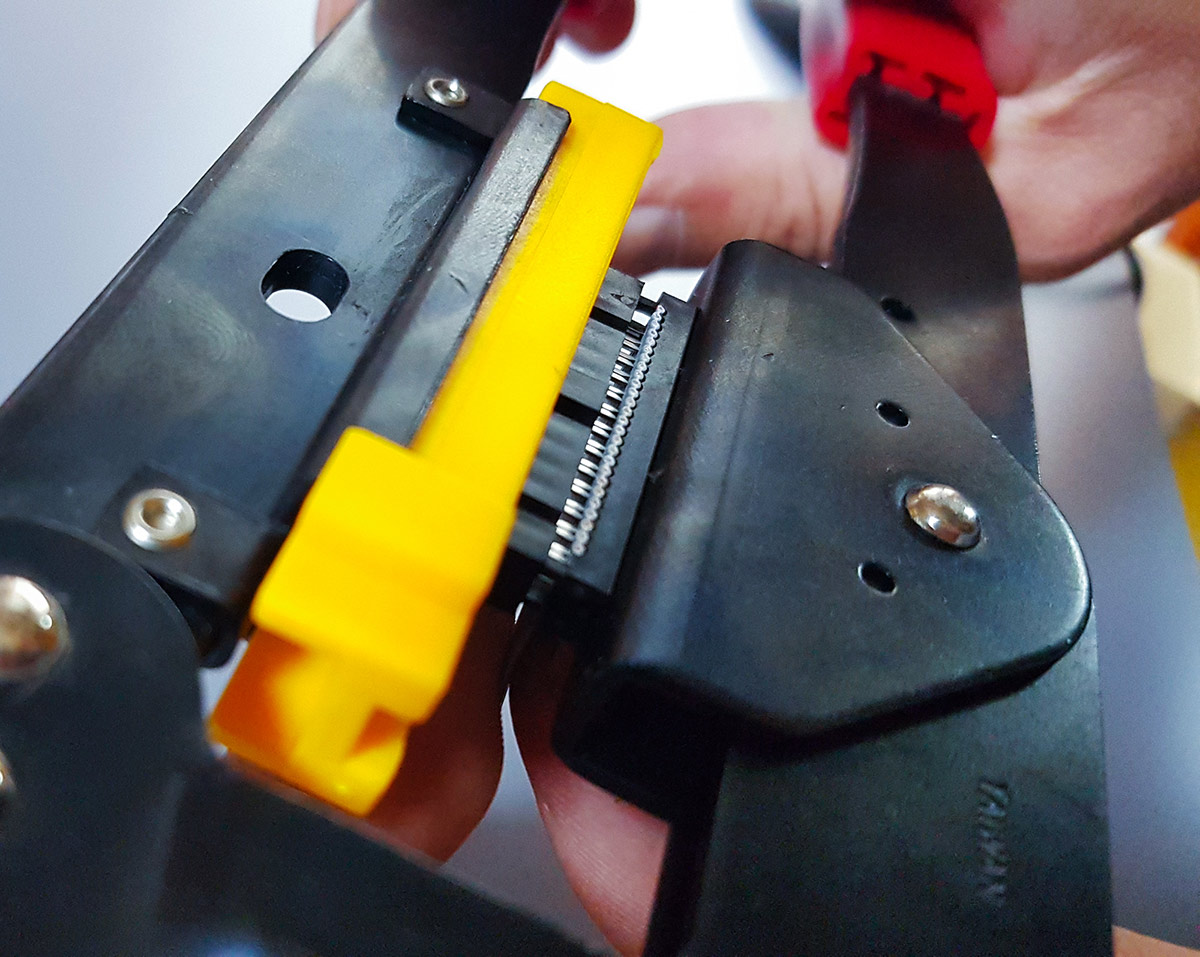
Step 2: Crimp it Down
Place the assembled connector into the crimping tool. The tool has a recess that fits the raised key on the connector body. Squeeze the handle firmly until it stops. The tool will apply perfect, even pressure, pushing the sharp contacts through the cable’s insulation and making a solid connection with each wire.
Step 3 (Optional): Attach the Strain Relief
If you’re using a strain relief, fold the cable back over the top of the connector. Then, clip the strain relief onto the sides of the connector body, locking the folded cable firmly in place.
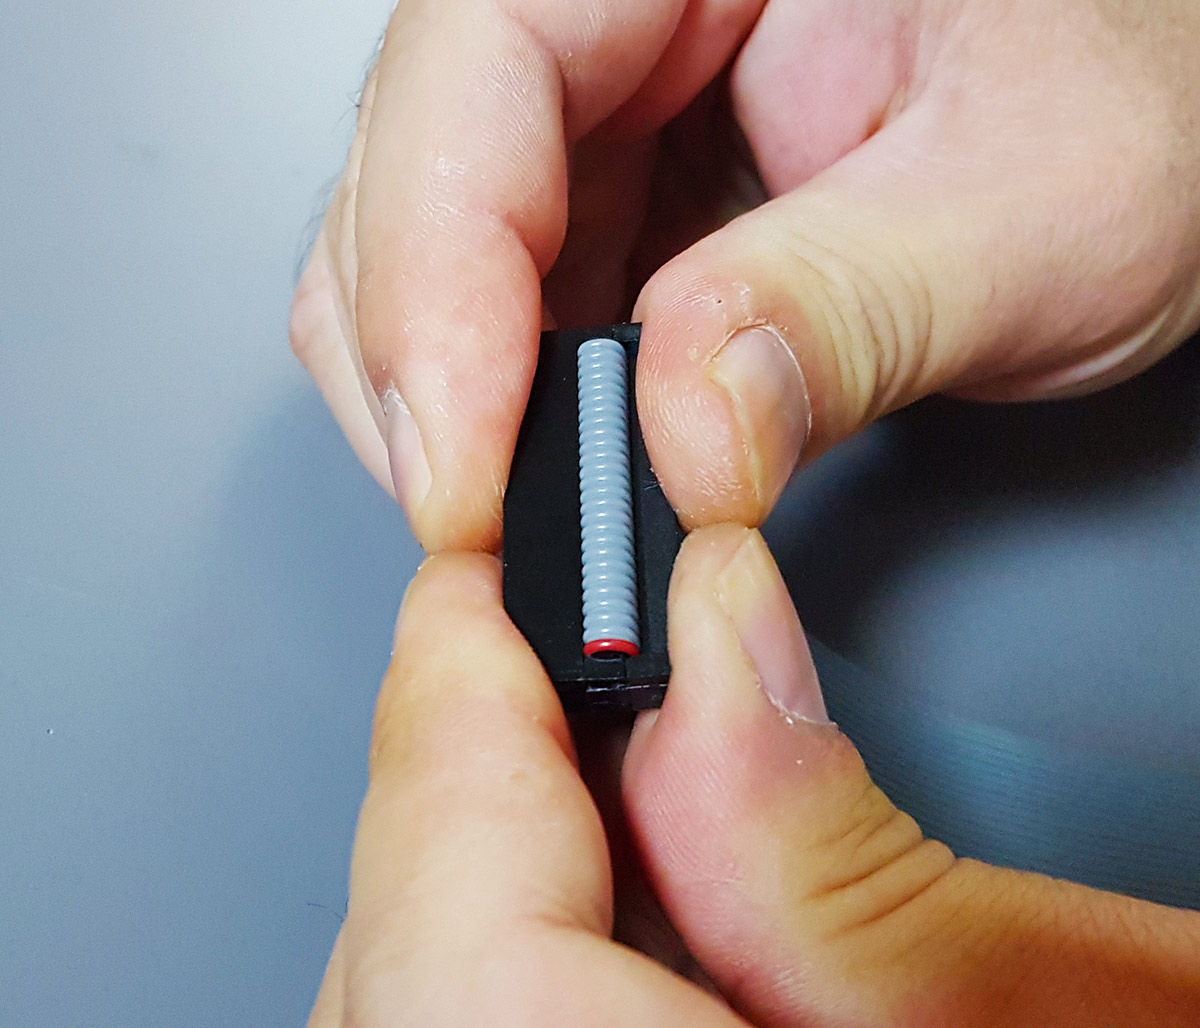
Repeat the process for the other end of the cable, and you’re done!
The Finished Product
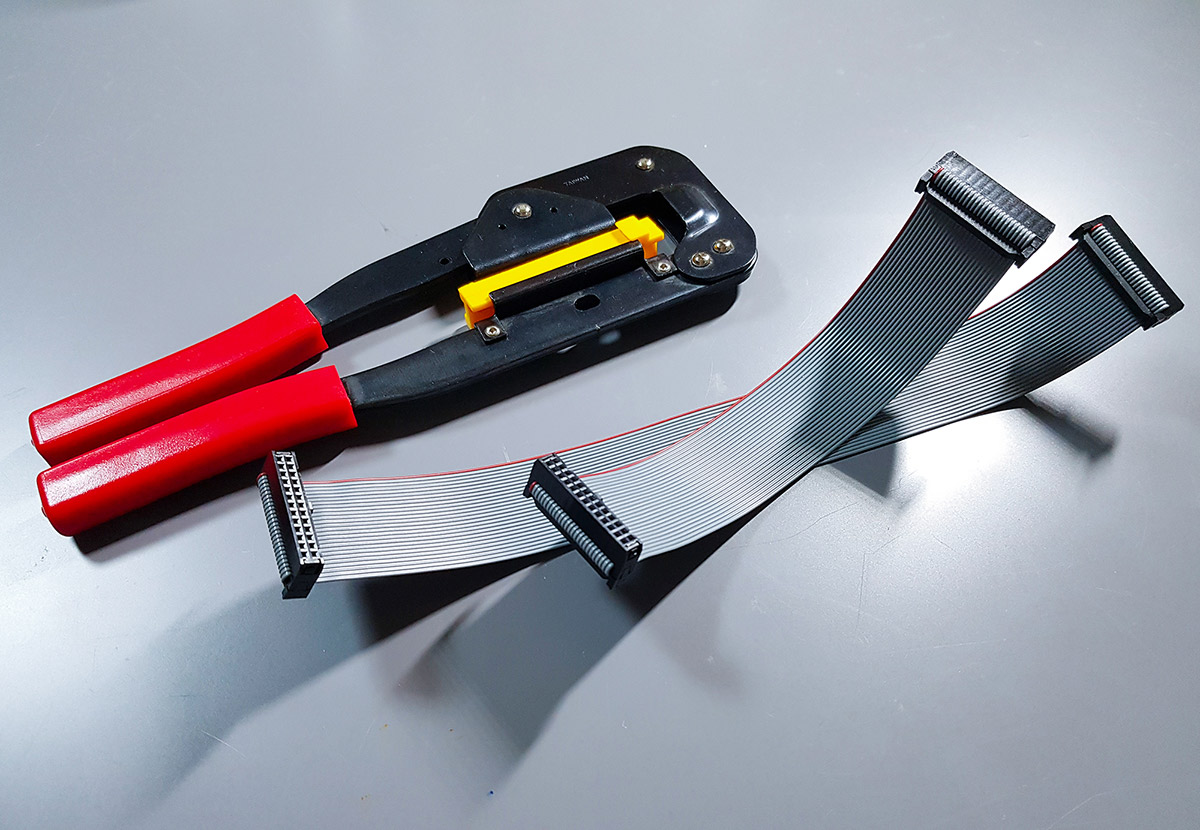
And there you have it. In terms of speed, making these cables feels like wielding a goblin’s magic club—you just put the parts together, give it a squeeze, and poof, a finished cable appears. Its only real selling point is speed, but when you need a custom cable now, that speed is everything.
If only all connectors were this easy to work with…